Happy Halloween! Running the pumpkin on Track 1

Happy Halloween! Running the pumpkin on Track 1
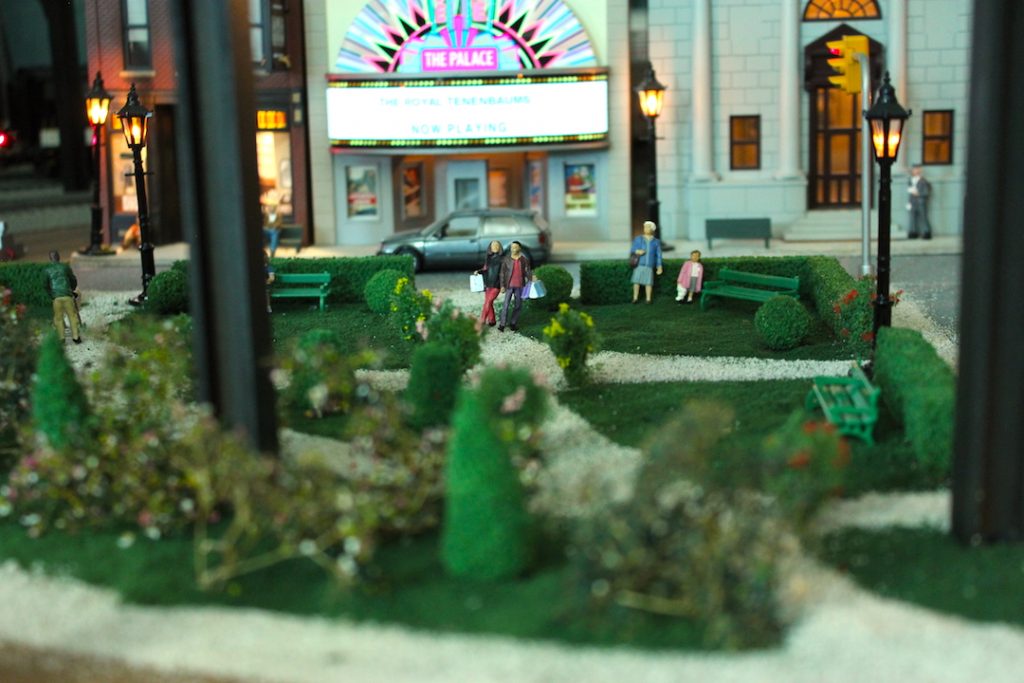
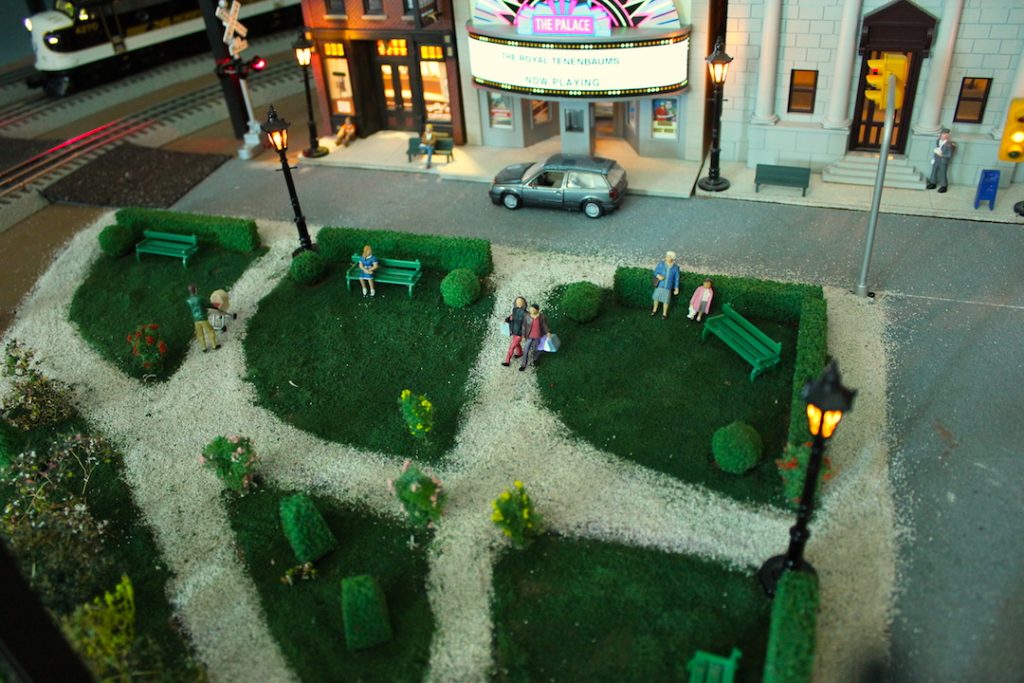
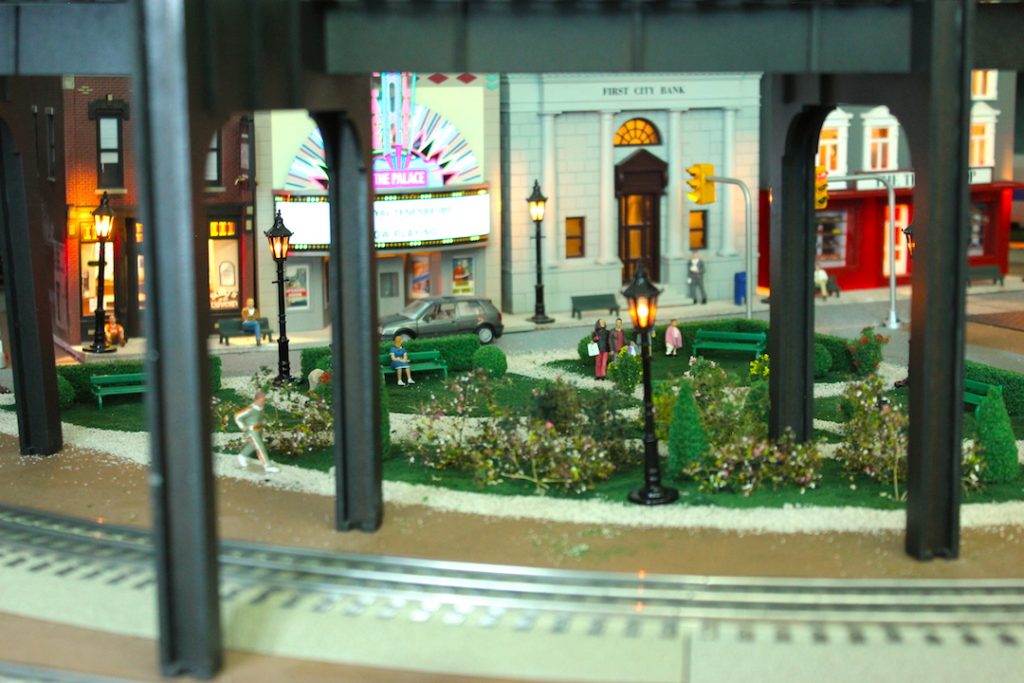
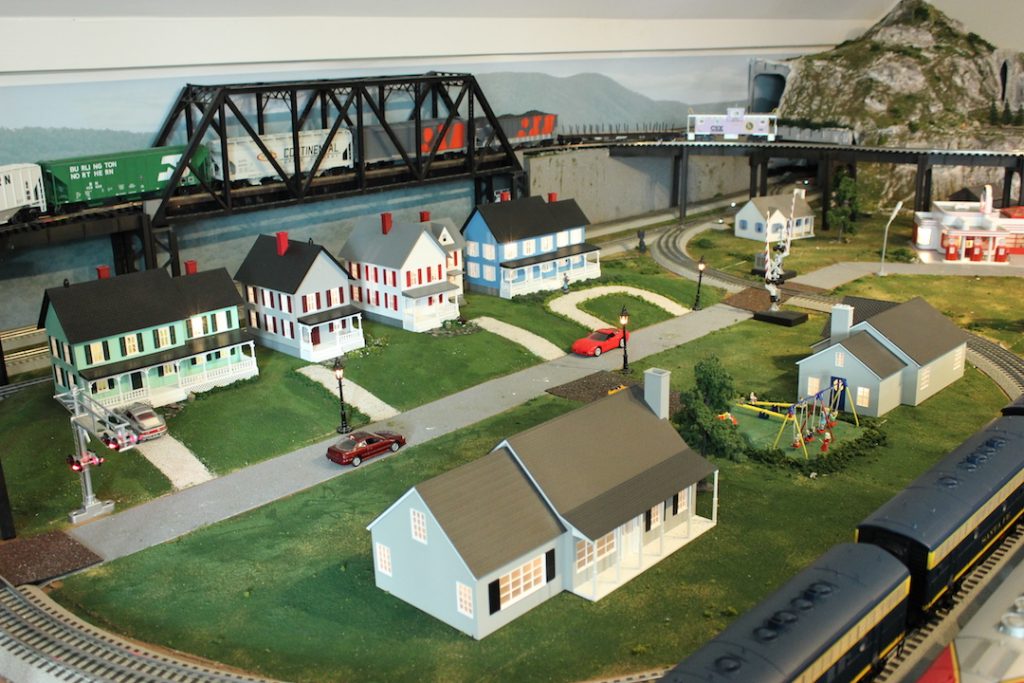
We took some time yesterday and today to add some detail to our downtown area by adding in a small park with paths:
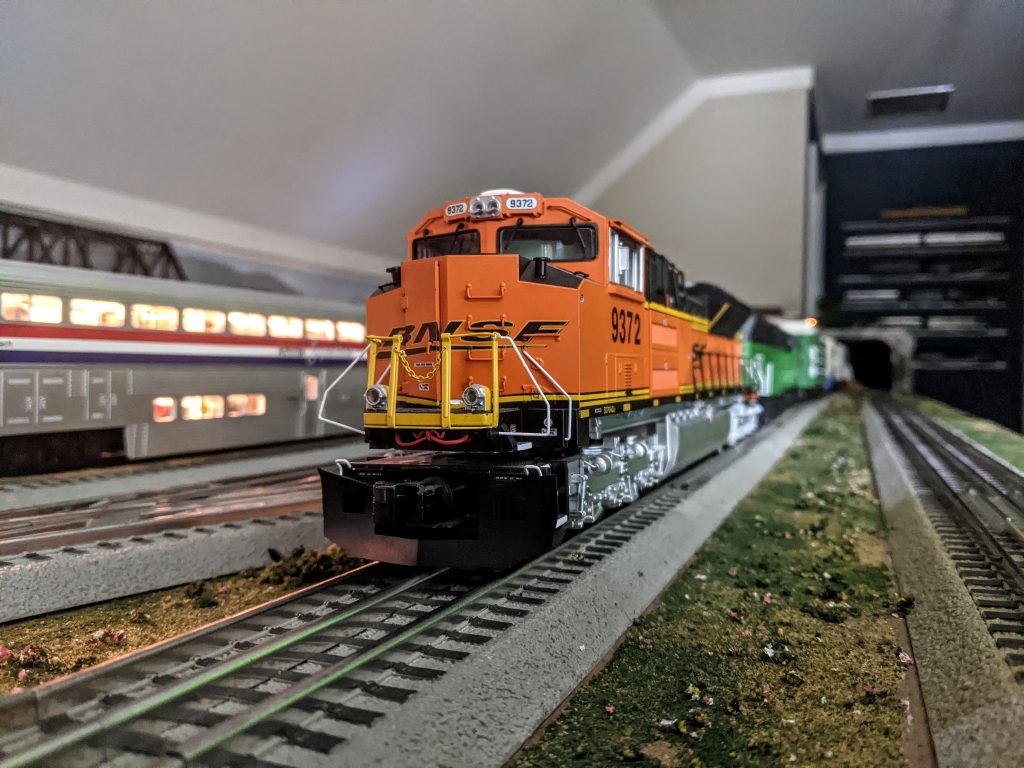
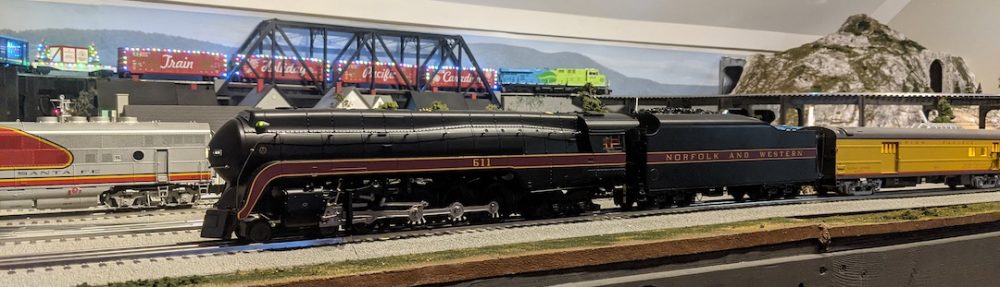
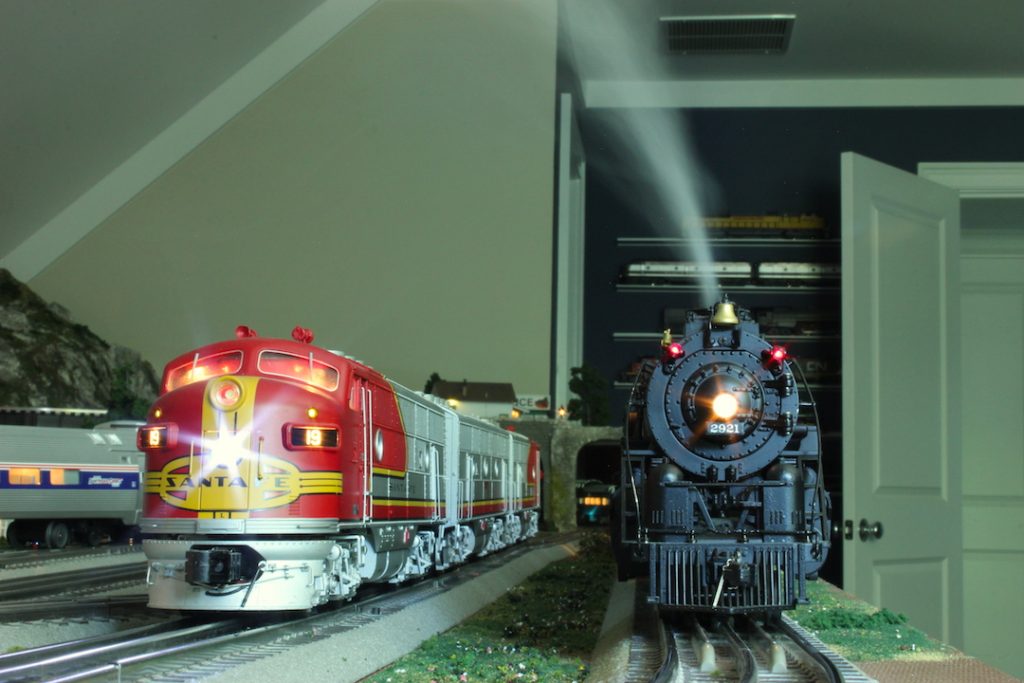
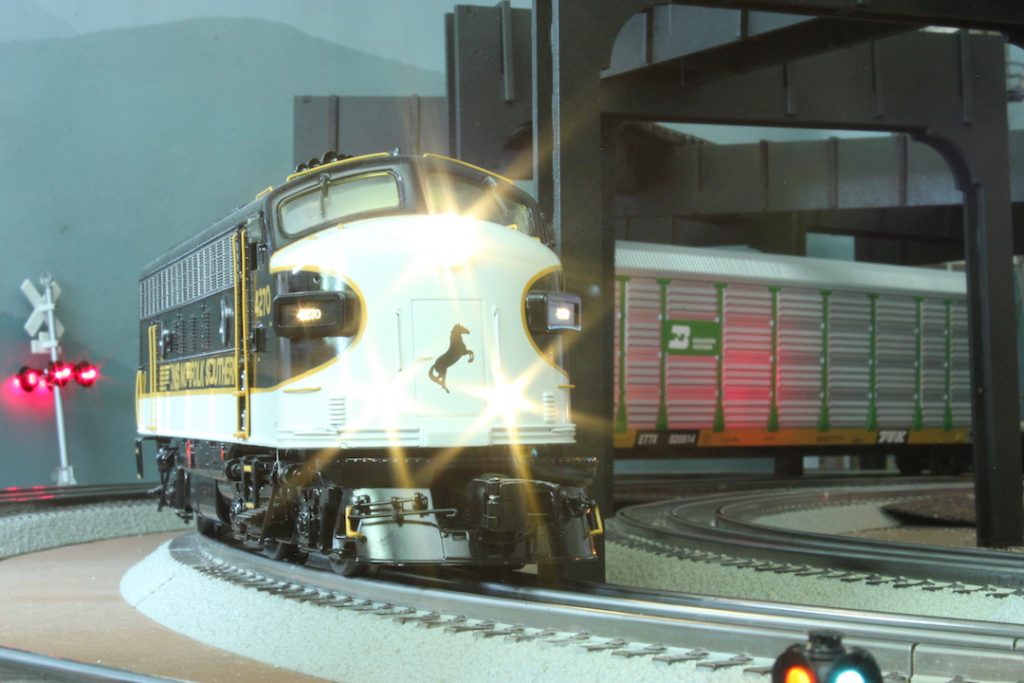
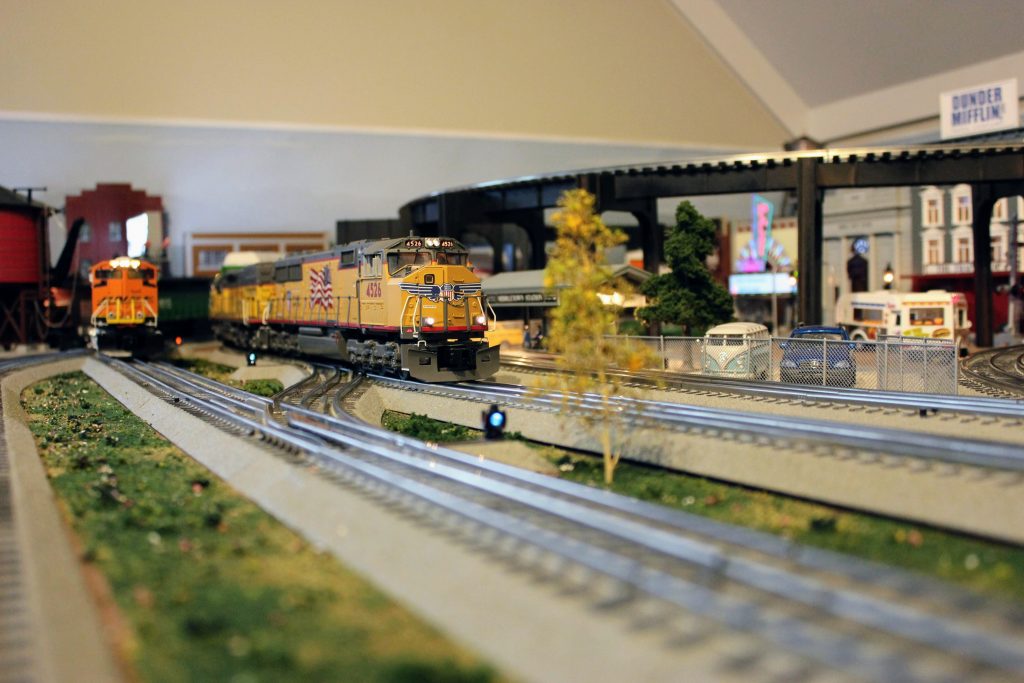
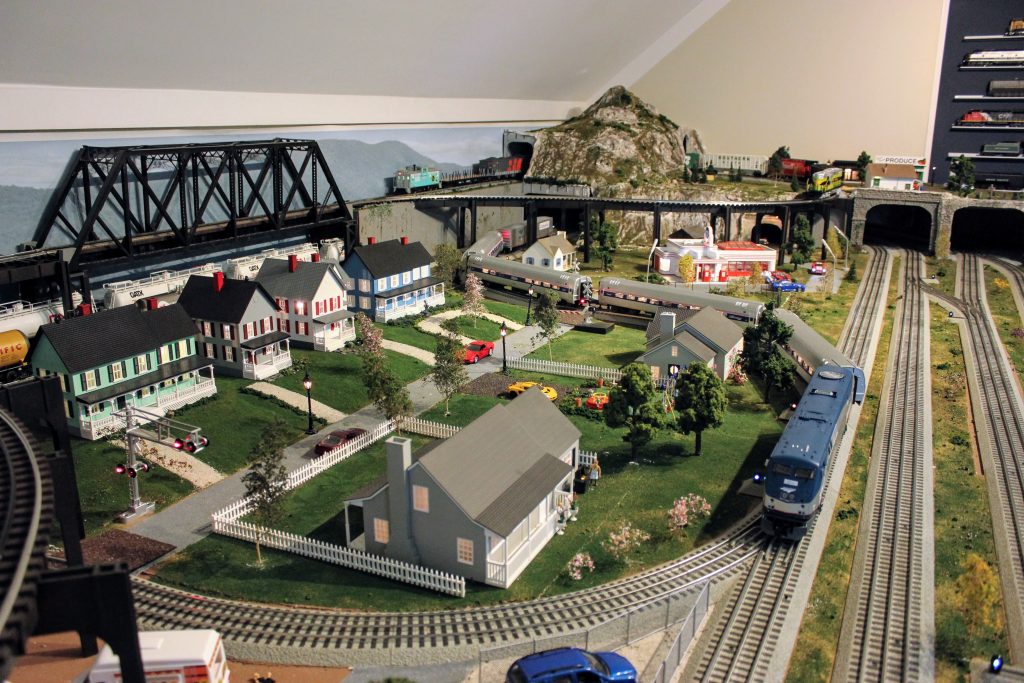
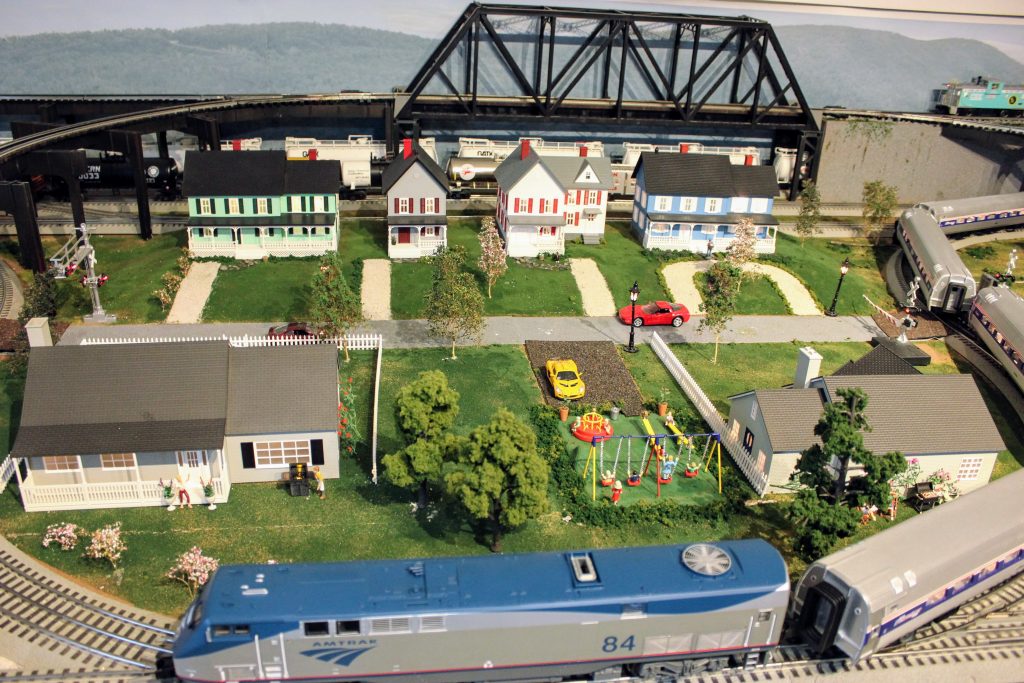
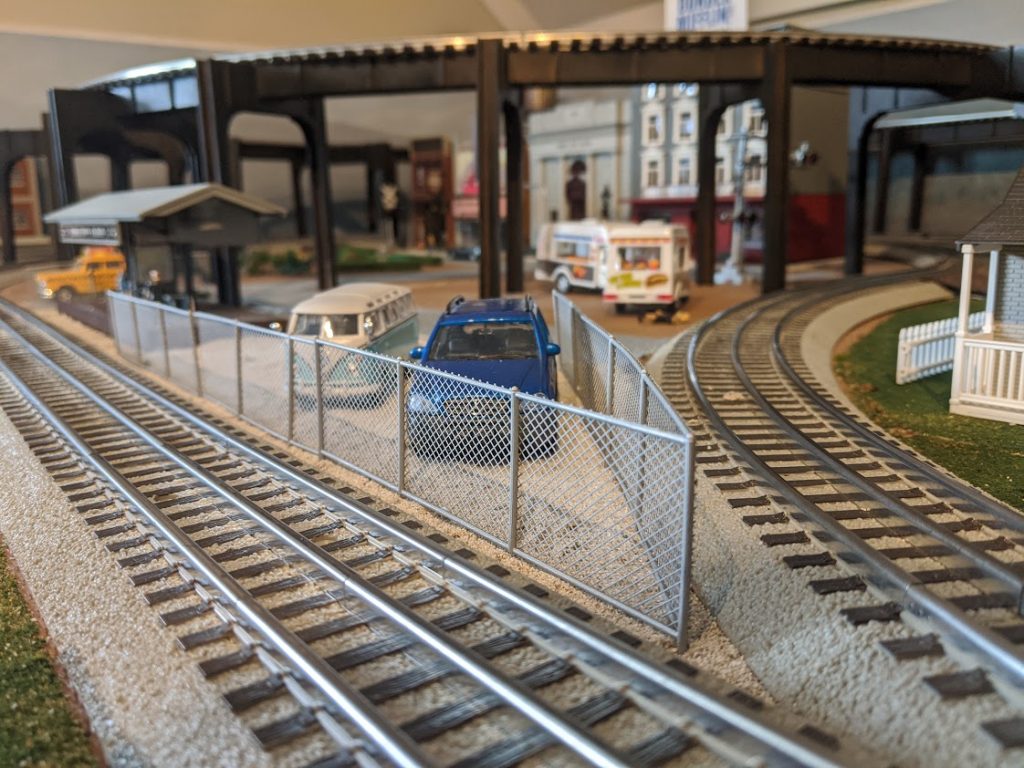
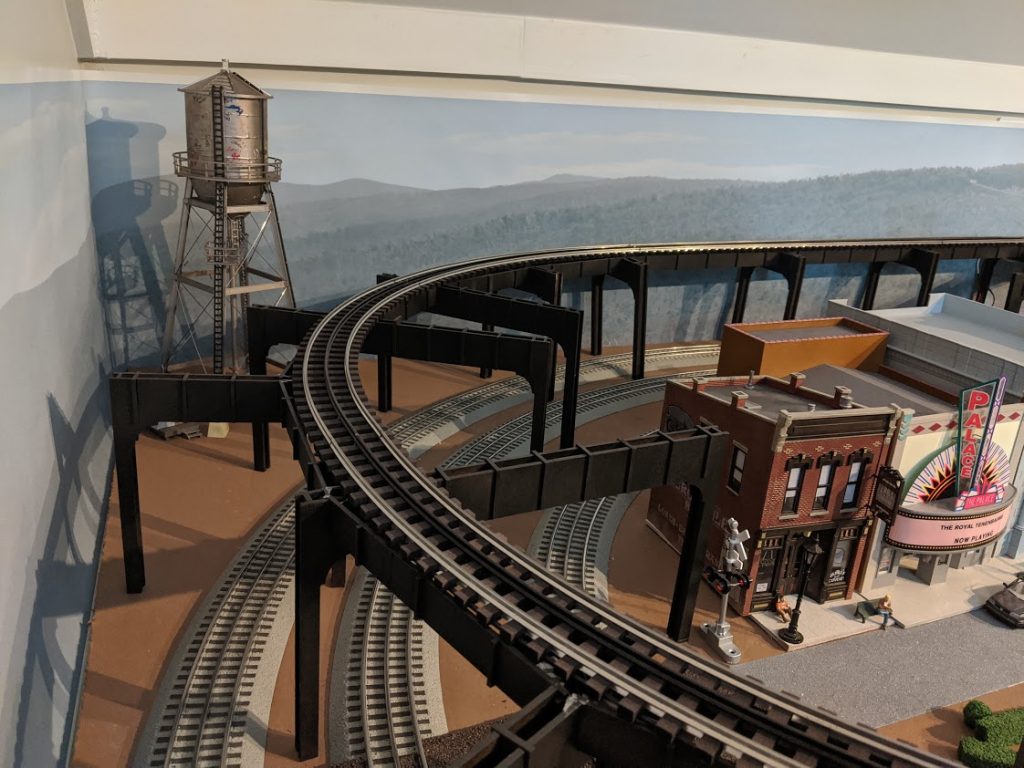
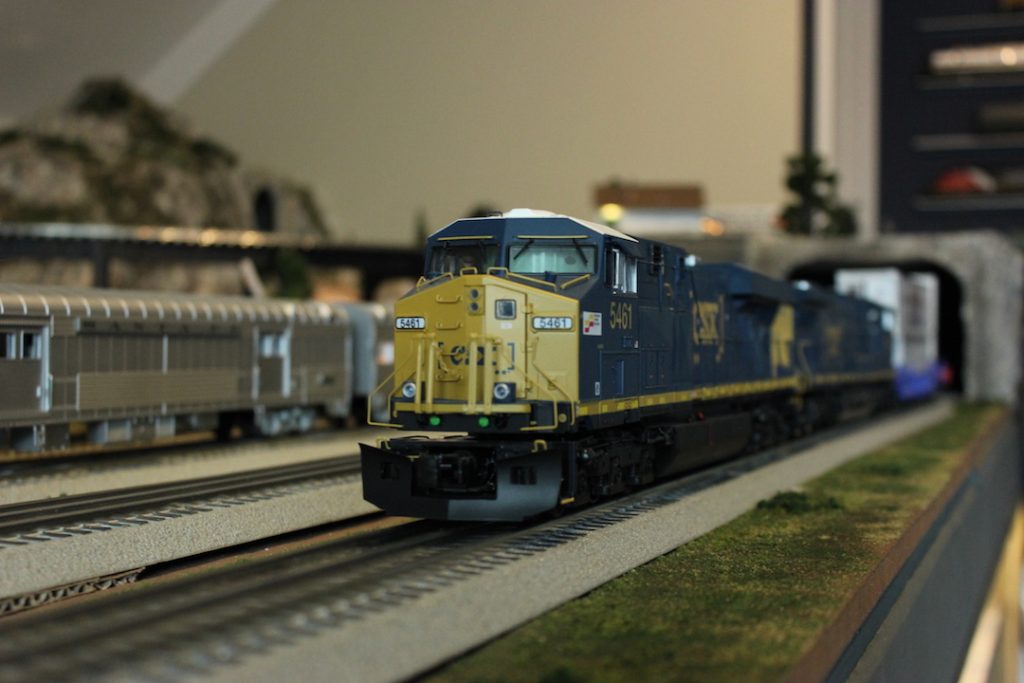
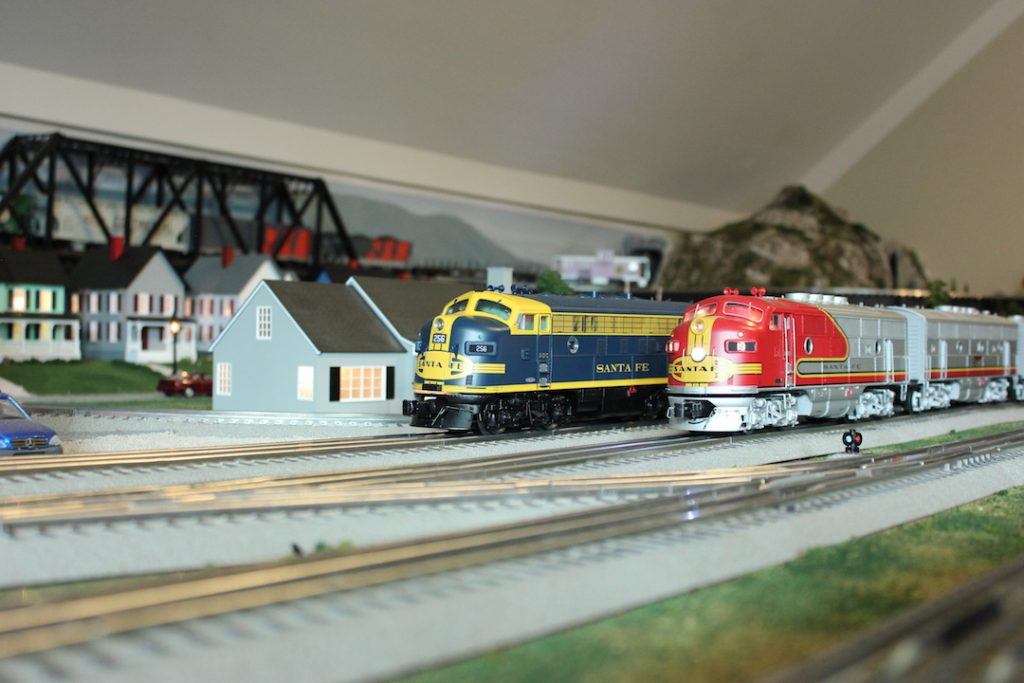
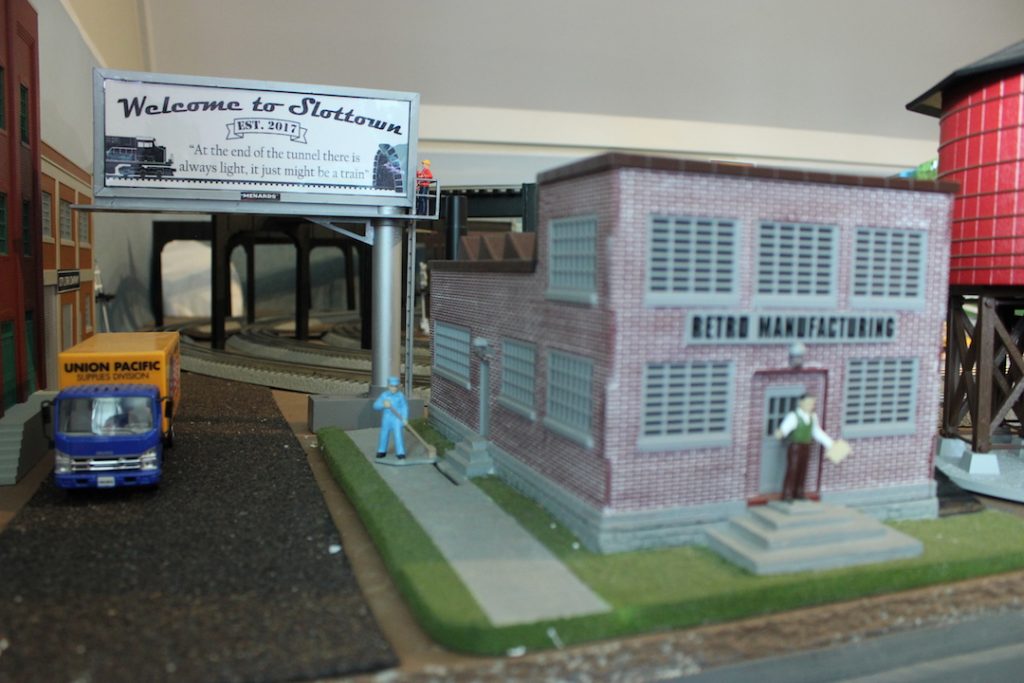
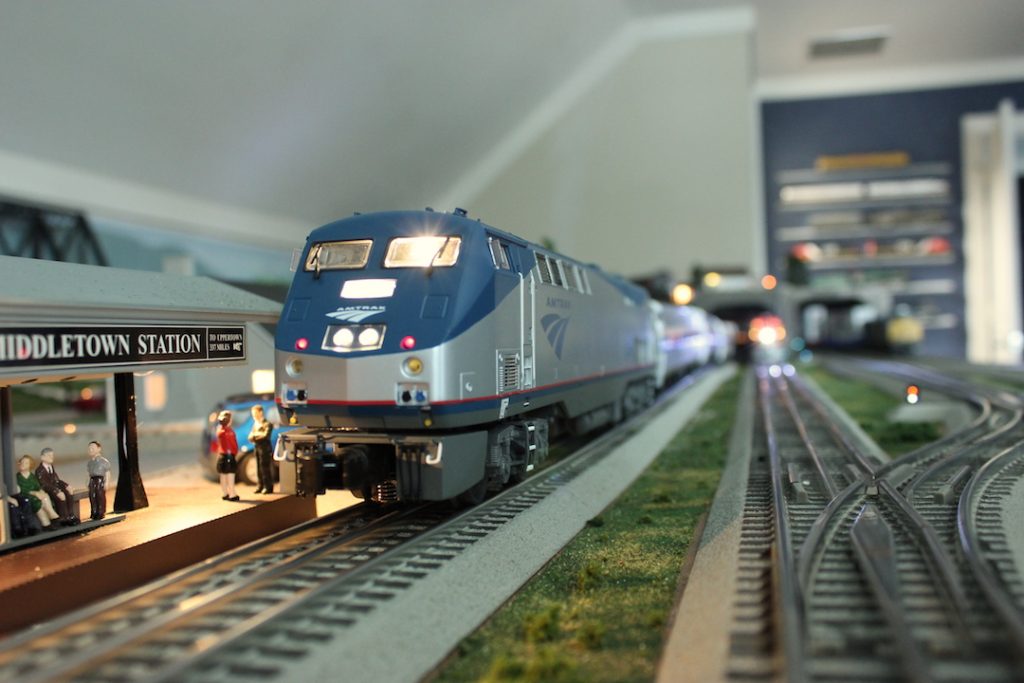
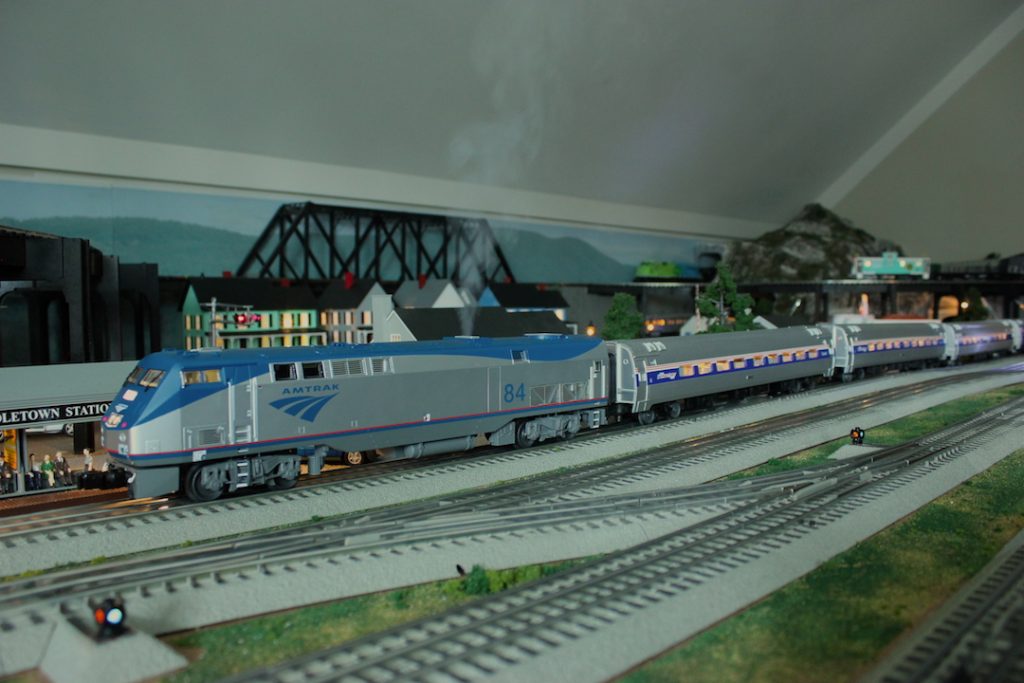
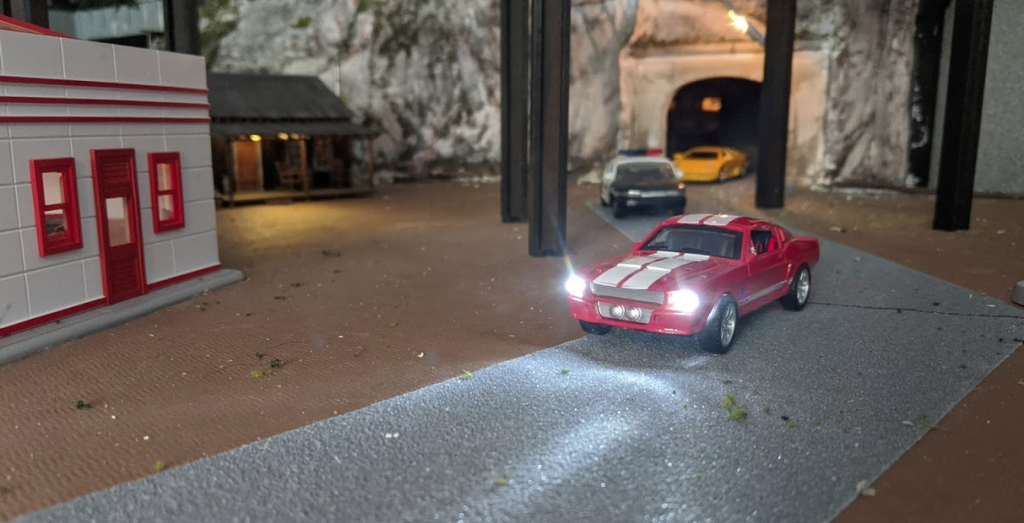
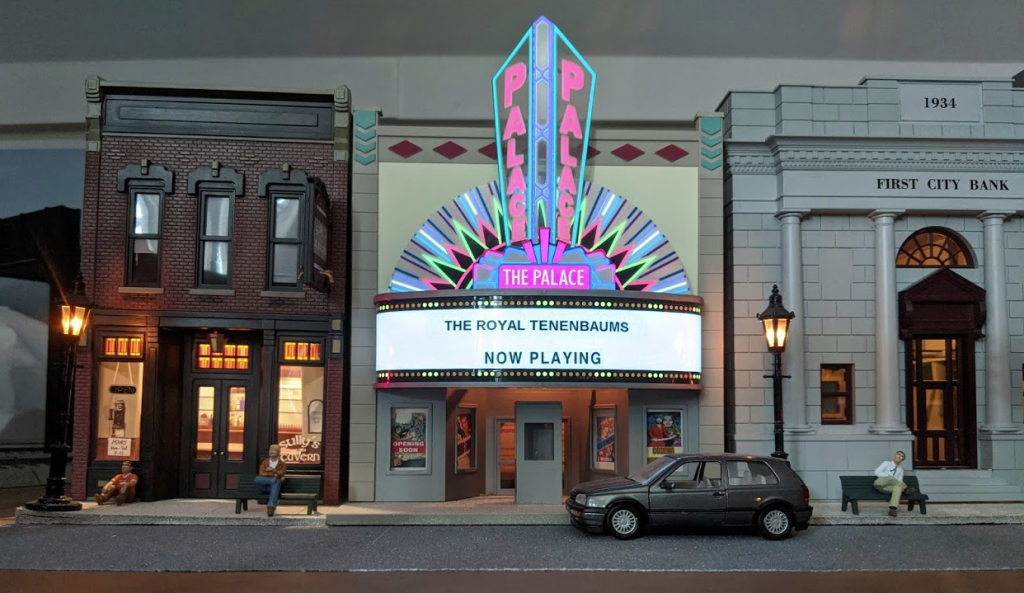
With the camera out, I figured I’d get a few up-close shots of what’s on the layout today:
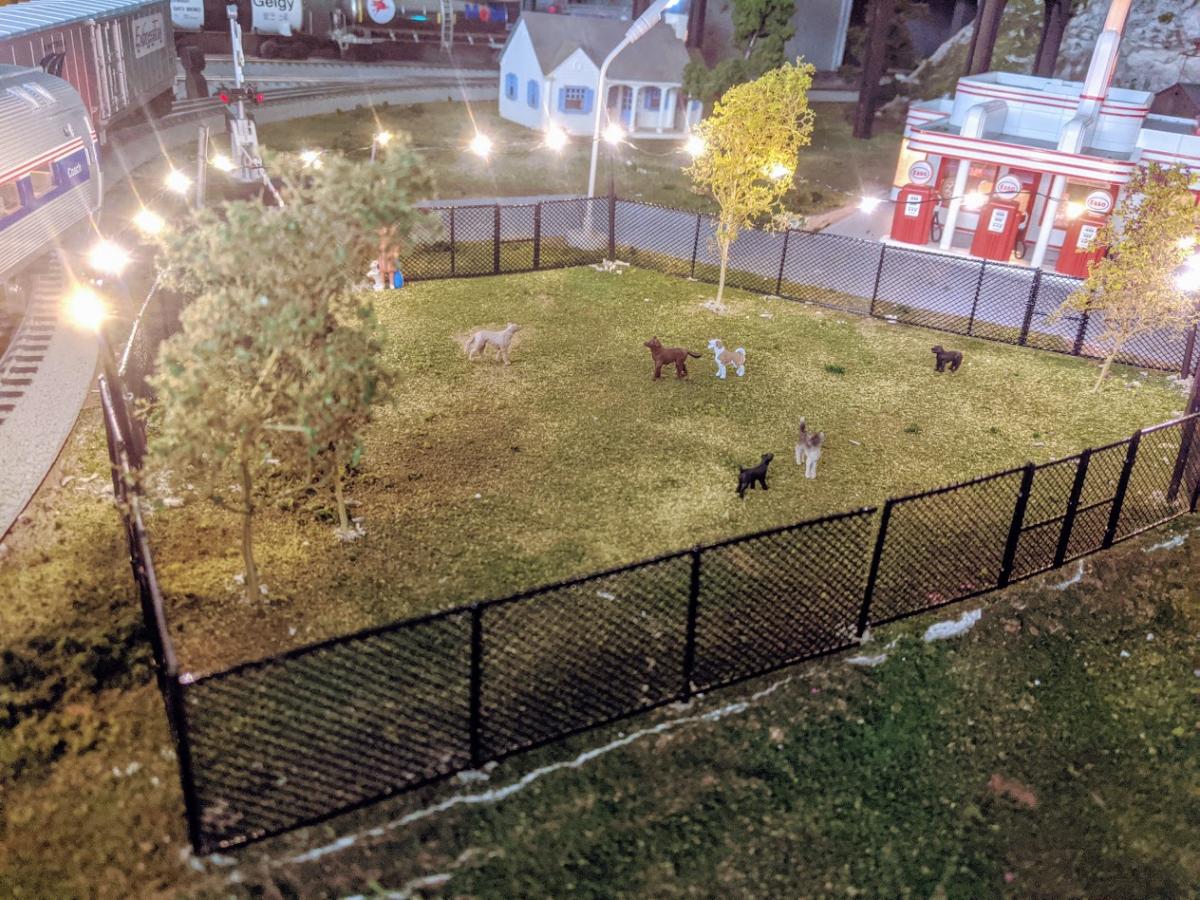
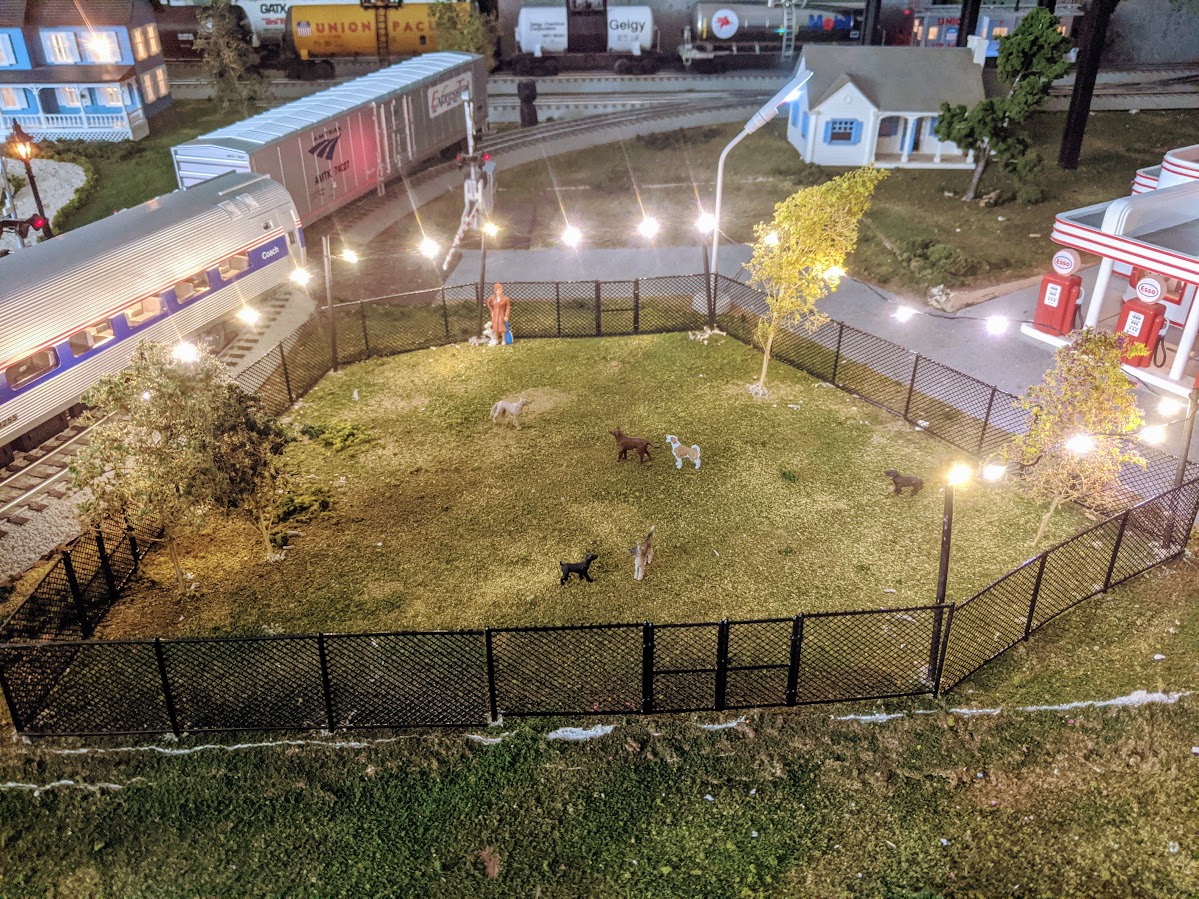
We added a few additional touches to the dog park:
– Used some inexpensive LED string lights. I just cut off the battery pack and wired them in to my layout DC source. The batteries included with the string lights were 2 x CR2032 3V but my DC source on the layout is 4.5V. The wires were originally silver, so I painted them black with some acrylic paint
– Used some bamboo grill sticks for the light supports, just cut them to length and painted them black
– Picked up a few Arttista dog figures to populate the park
We still need to add a few additional details, but we may wait until we purchase a 3D printer:
Spring has sprung in Slottown – this past weekend, in the spirit of “Social Distancing” due to these unprecedented times and because we finally got some clear weather to use our Scenic Express Super Trees starter kit to make some trees –
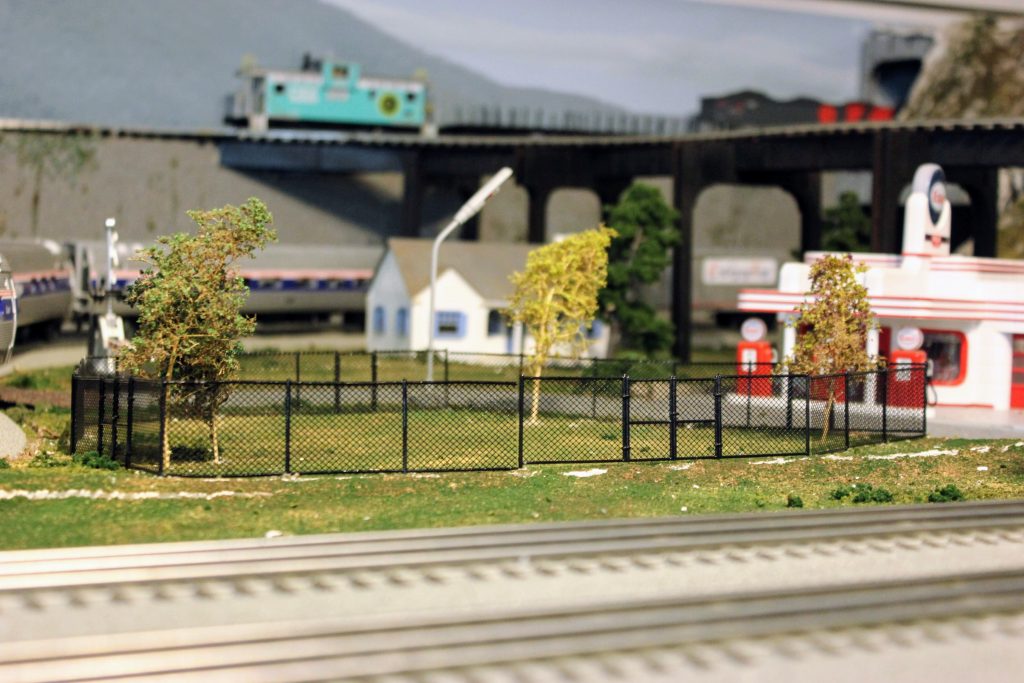
The fences are the new Woodland Scenics fencing system which we painted black for the dog park.
We have lots of “flock” and “realistic leaves” left over, so I’ve put an order in for some Sedum “Autumn Glory” seeds which we’ll plant this weekend. Come fall, we should be able to harvest the dried flowers to make more trees.
All in all, the O Scale layout is shaping up – we still have the downtown area to apply scenery, then finally add some road signs and maybe telephone poles (undecided on the latter due to the finicky nature).
We popped by Legacy Station this weekend to pickup our pre-ordered MTH Railking Stone Mountain Railroad GP9 and ended up with a few more items we just couldn’t say no to.
The Stone Mountain Railroad was an iconic part of my childhood, as it’s a small tourist railroad that runs around the geographic landmark of “Stone Mountain” (made famous in more recent years by “Kenneth” from 30 Rock). As such, we had to have a model of it on Slottown! The model is par for the course for MTH Railking scale – what exceeded our expectations was the clarity and depth of sound – it sounds better than so some of our older PS3 locomotives

In addition to the new locomotive, we added a few other items:

We continue to work on scenery and ground cover – if we can get a few days of clear weather we’ll get to making some new trees (since our Scenic Express tree kit requires we spray glue outside)
While the 3 rails of O don’t really bother me (quite the contrary actually, I love the benefits it conveys in regards to reversing loops, train detection, and electrical connectivity) I had previously lamented the lack of availability of certain models in O scale along with the high cost of rolling stock and locomotives. And being the great listener is, my wife took note.
To my surprise Christmas morning, I opened one of my gifts and found a Kato N ES44AC Freight Train set. So cool! I wasted no time in getting the oval of track setup on the kitchen table and got the train running. The set is pretty great, it includes an oval of Kato Uni-track, a locomotive, six freight cars, and a transformer.
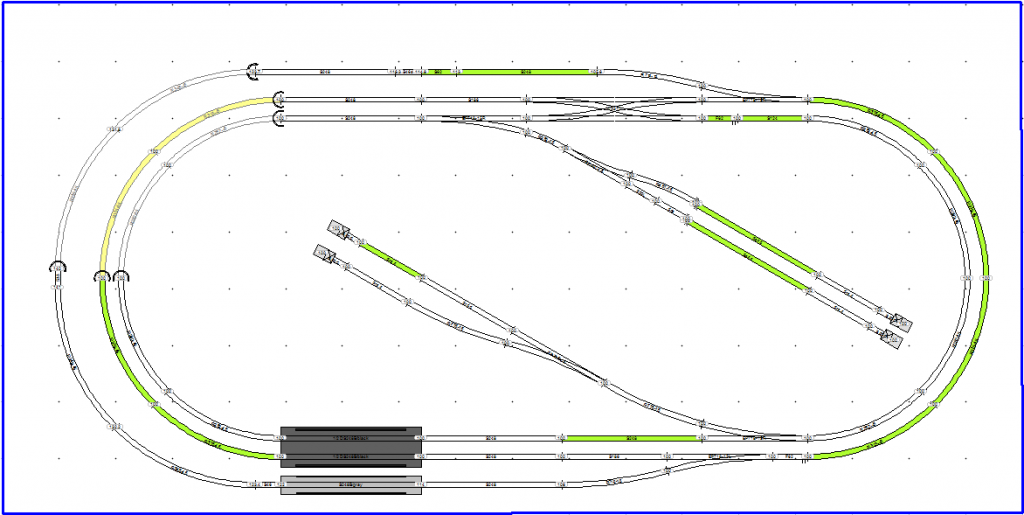
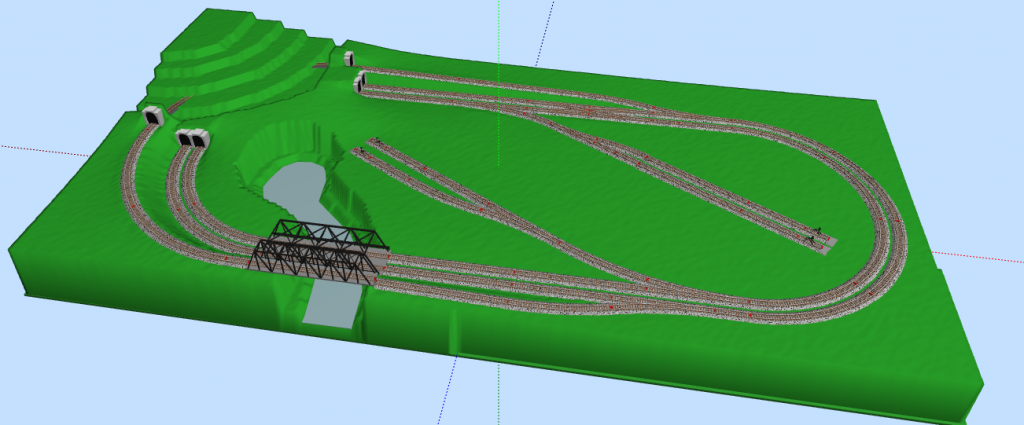
I wasted no time in designing a track plan and building a table. I ended up using the Kato Amherst 2005 layout as inspiration, mostly due to its compact size along with interesting track plan. Because I had a bit more space available, I ended up increasing the radius of all of the curves to accommodate larger rolling stock as well as added 248mm straights to lengthen the plan:
For those interested, here is a parts list for the layout.
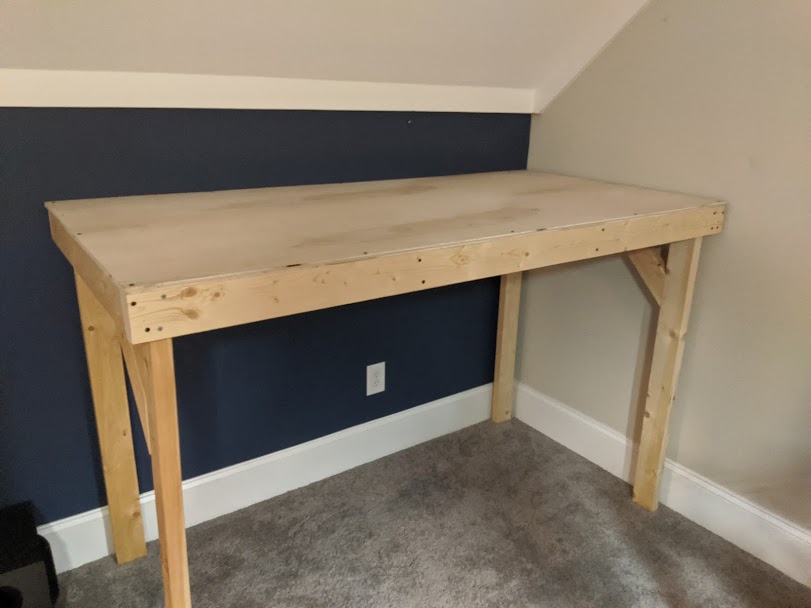
Within a couple of days, I built a table for the new layout with tabletop dimensions of 900mm x 1800mm and a total height of 1150mm (including casters and 2″ insulating foam)
Additionally, I wasted no time in picking up a few additional locomotives that are rare or hard to find in O – compared to O scale, N scale locomotives are a bargain!
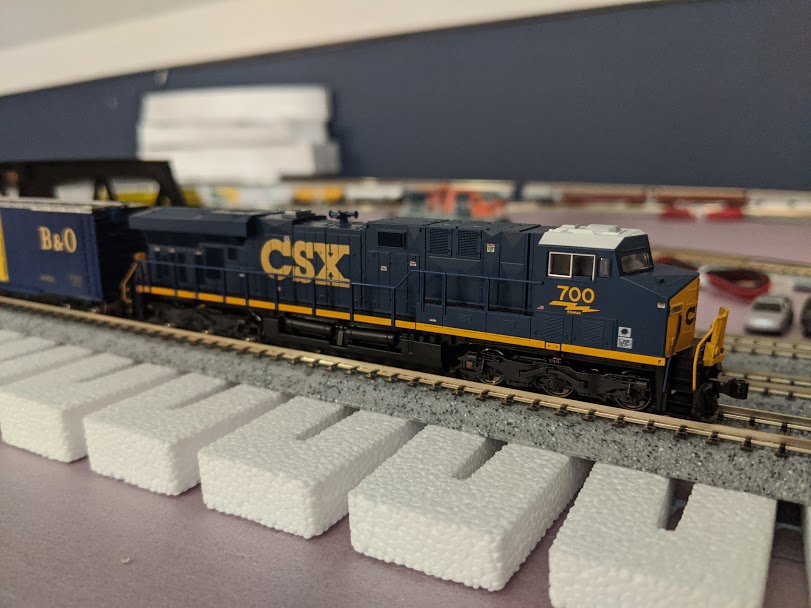
Kato CSX ES44DC
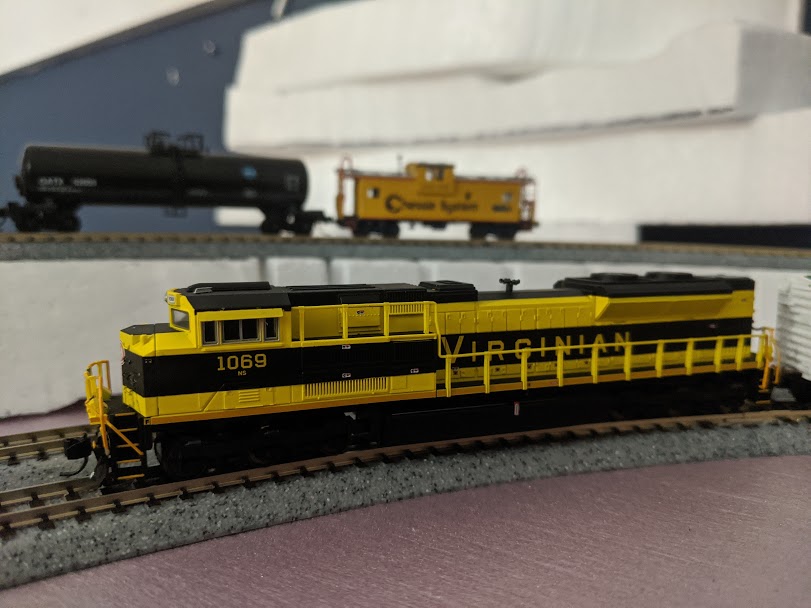
Fox Valley Models NS Heritage Virginian SD70ACe
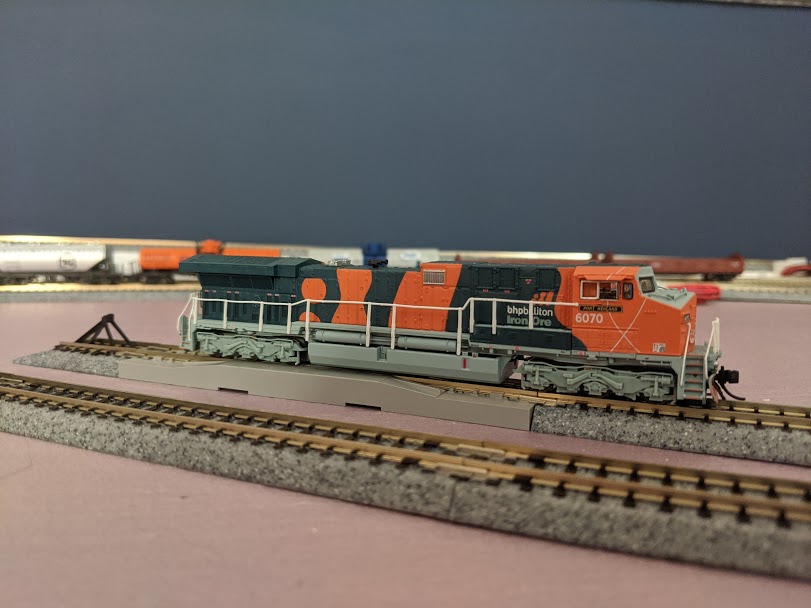
Broadway Limited Imports BHP AC6000
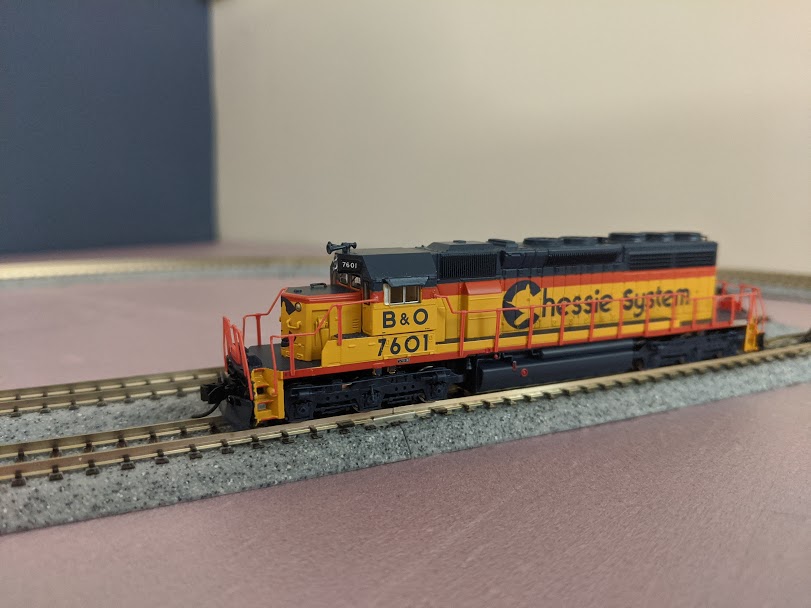
Broadway Limited Imports Chessie SD40-2
One cool thing I didn’t know was that some N-scale locomotives now have sound onboard – pretty amazing! I picked up two Broadway Limited Imports locomotives that have Paragon3 sound along with Rolling Thunder. Rolling Thunder is a pretty great idea – because N scale necessitates very tiny electronics and speakers, it’s impossible to produce the low frequency sounds real locomotives emit. To work around this issue, Paragon3 sound boards include a small FM transmitter onboard which transmits low frequency sounds to a receiver, which then connects to a subwoofer. Because low-frequency sounds aren’t discernibly “localized,” the fact that the subwoofer is below the layout doesn’t really impact the perception that the sound is all coming from the running locomotive. The overall effect is pretty cool, and now my N-scale locomotives sound truer to the real thing than my O scale models!
As for rolliing stock, I picked up some additional freight cars, mostly a mix of Microtrains and Atlas, at a recent model train show.
I’ve started getting the sub-terrain set up by cutting in a river and pond into the base foam and using Woodland Scenics 3% incline grade

Next up I will be picking up a Digitrax Zephyr DS52 and a few decoders (one for the Kato and one for the FVM locomotives) as well as decoders for the turnouts. I’m pretty excited about the Digitrax controller as my plan is to implement JMRI on a Raspberry Pi to allow me to control the layout using a smartphone or web UI
Admittedly I am really enjoying the 2-rail N-scale life, it’s presented a lot of opportunities and challenges that I haven’t had to face with the O scale trains. I’ll try to keep the blog up to date as we make progress on both layouts!
I’m overdue for an update to the layout but time has been limited due to work – in lieu of text, here’s some quick photos detailing progress and new rolling stock
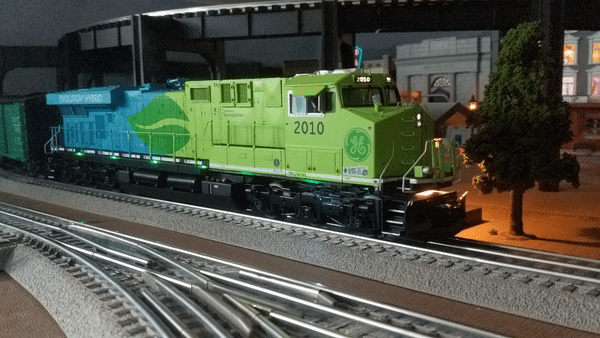
Let’s party like it’s 2010 – I picked up an MTH Premier ES44 “Evolution Hybrid” from eBay.
If you’re following my roster, you’ll note that I actually already have a CSX GE ES44AH, but I was smitten by the Evolution Hybrid Demonstrator for a few reasons:
Over the Thanksgiving holiday and had a bit of time to sort out my accessory power setup, particularly for DC accessories.
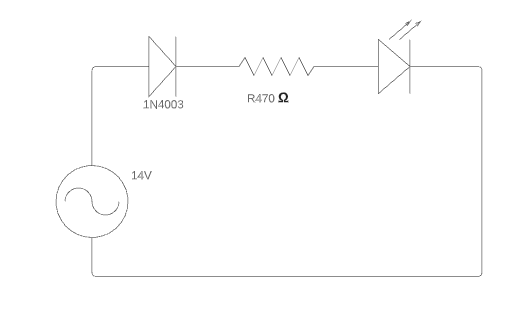
To date, I’ve been using “one-off” options for the few DC accessories I have on the layout – for LED street lamps or building lights, I’ve just been using diodes and resistors in-line with the LEDs to step down the power for the LEDs:
While that’s been fine for the few LEDs on the layout, I wanted a more robust option for my Atlas O Palace Theater and Menards lit vehicle. For the theater, I’ve just been using a “wall-wart” plugged into a surge protector I use to power the track and accessories. And for the Menards vehicle, it’s been sitting unilluminated on the table top.
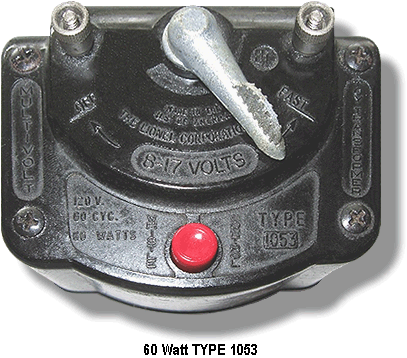
I considered using a dedicated DC transformer for the task but that seemed silly when I already had a dedicated accessory transformer that was nowhere near it’s load limit. I went through a number of iterations of transformers before I landed on my permanent solution:
Once I sorted out my accessory power, I was ready to create my dedicated DC circuit using a (hefty) full bridge rectifier and a Buck step-down regulator. This was relatively simple – it gives me a consistent 4.5VDC source for my DC accessories:
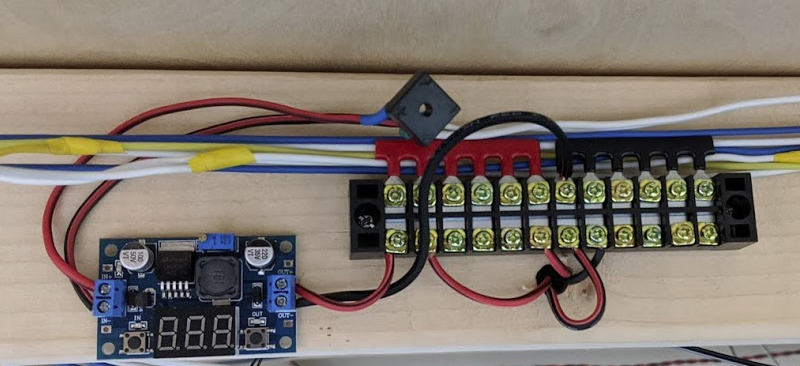
Unfortunately my eBay-special buck regulator’s LCD screen does not work, however it shouldn’t be an issue since the regulator itself works and it lives under the table anyways. I may eventually replace it with a working one, but for now it’s doing the trick.
And the final result:
Okay, I admit it, I have a problem – an addiction if you will. Not to model trains in general, or to electronic circuit design, or perfecting my layout scenery. No, my addiction is more acute than that. I am addicted to models of 4-8-4 Northerns. If O gauge model trains are a Schedule 1 Drug, then 4-8-4s are heroine. I’m not sure what the allure is to me, perhaps the symmetry, the size, or the fact that the real thing highlights the “pinnacle of steam” (I’d argue more so than the larger articulated brethren such as the Challengers, Big Boys, or Y6bs), but it’s most definitely my favorite steam locomotive arrangement.
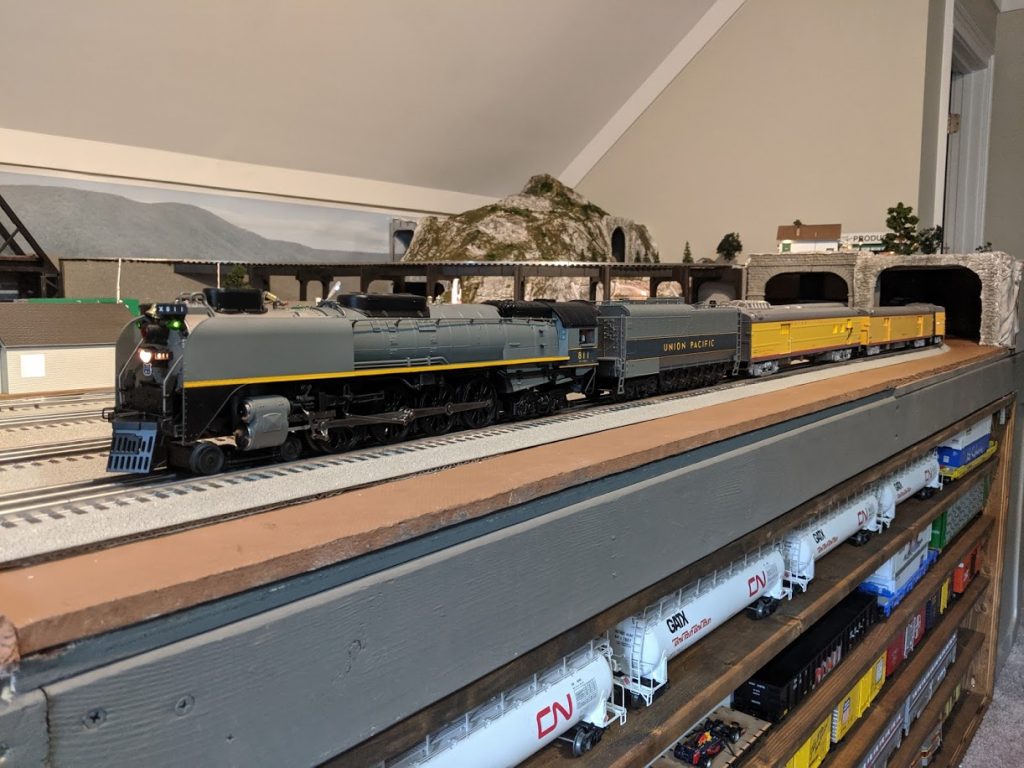
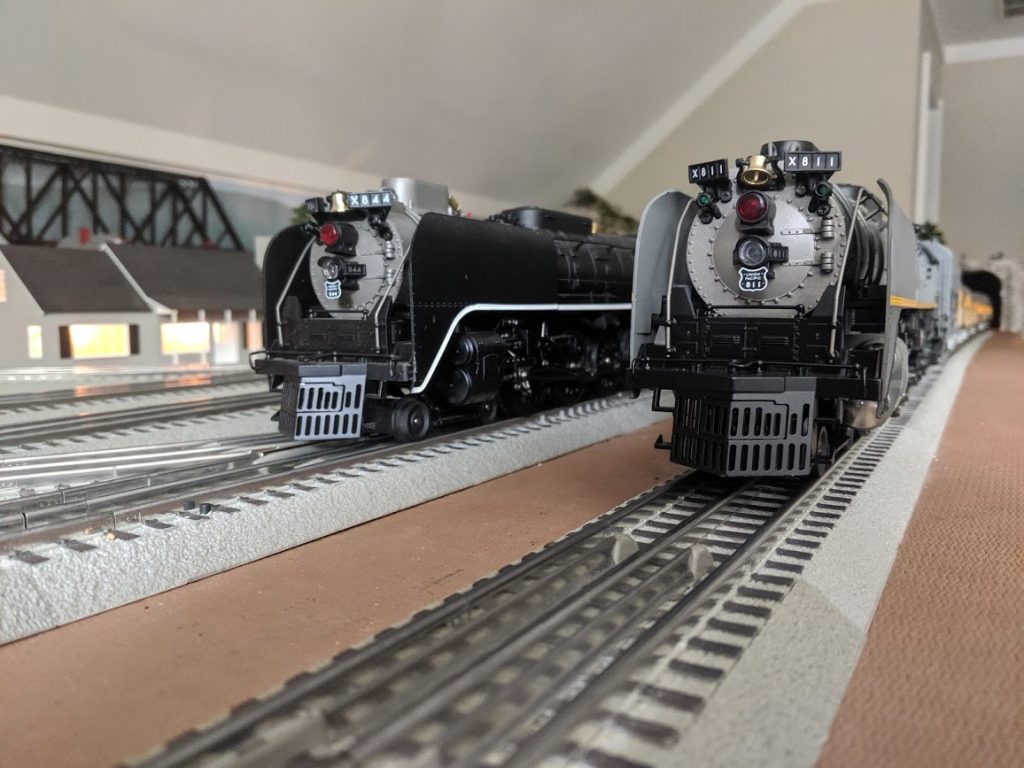
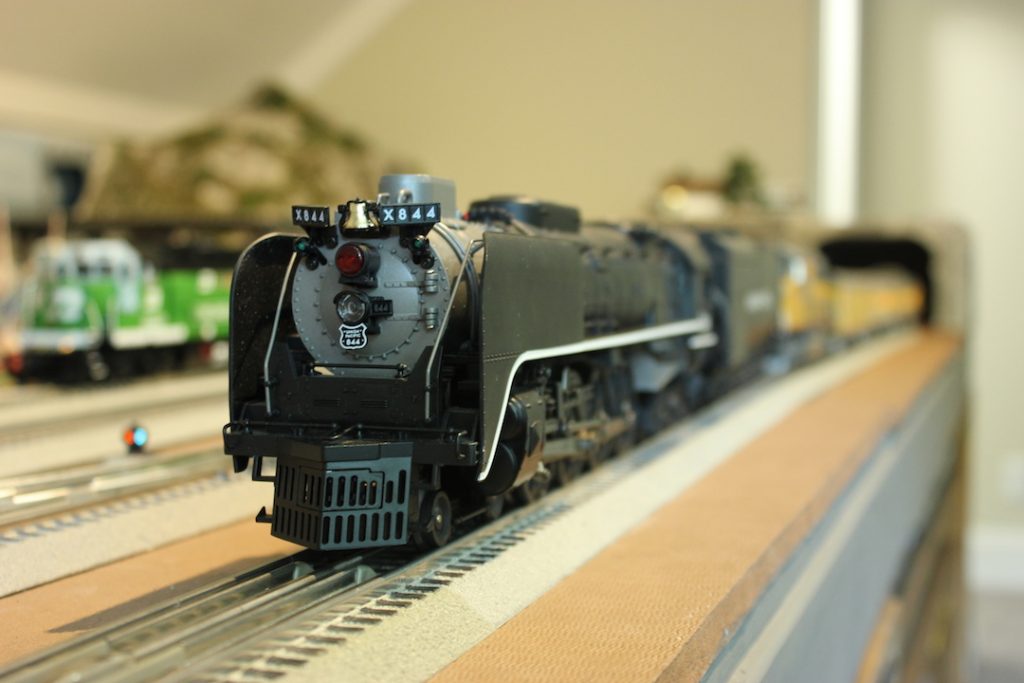
My collection now has three 4-8-4s, with a fourth on order from the 2020v1 MTH catalog. Most recently, I added a second UP FEF (UP’s abbreviation for Four-Eight-Four), this one in they greyhound paint scheme used for UP passenger service. My first UP 4-8-4 (#844) is a model of the restored and currently in-service excursion locomotive, which wears the later all-black paint scheme which was primarily used for freight service.
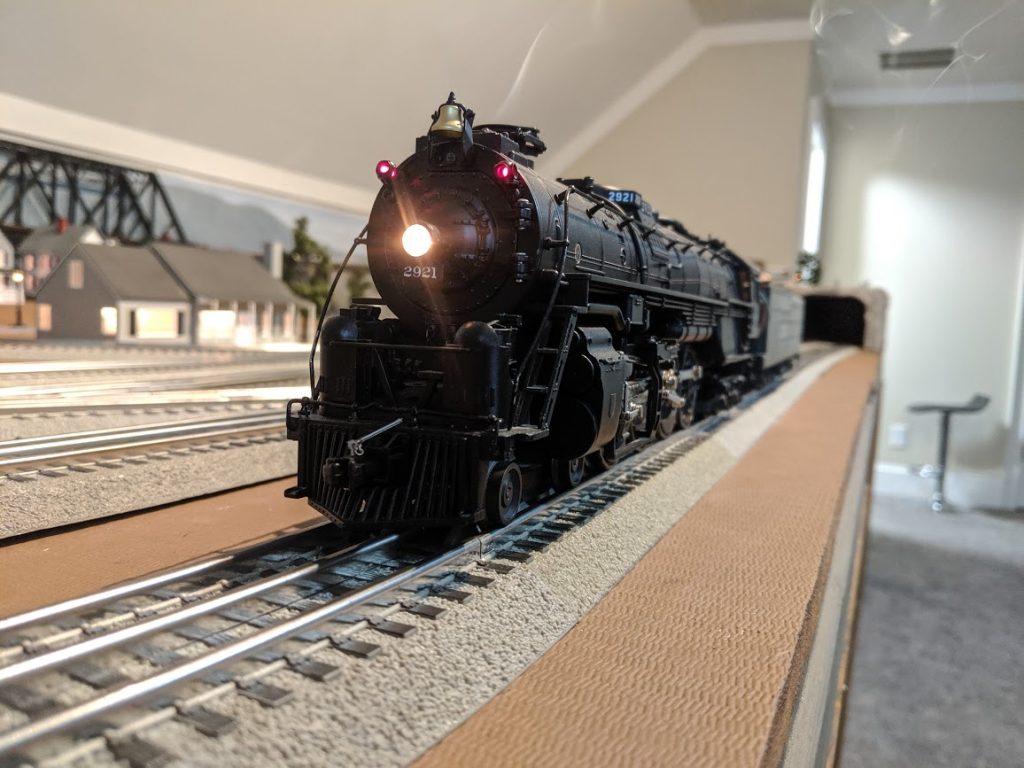
Here’s a few photos of the 4-8-4s:
The newest addition, UP #811:
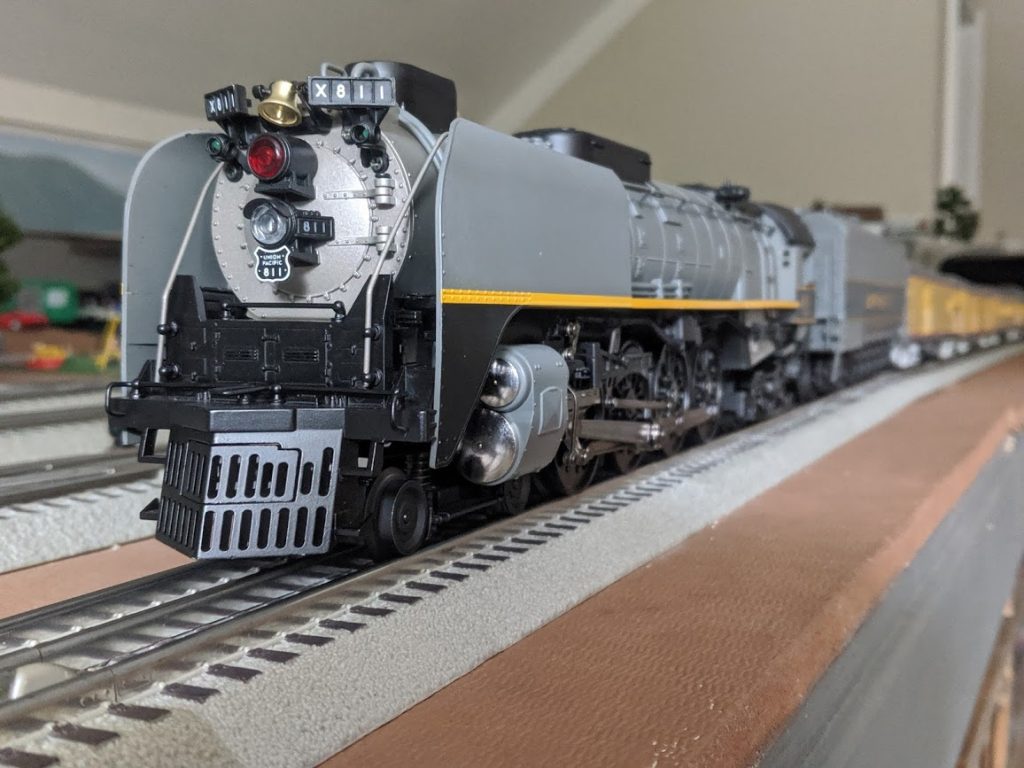
Brothers together (UP #844 on the left and UP #811 on the right):
UP #844:
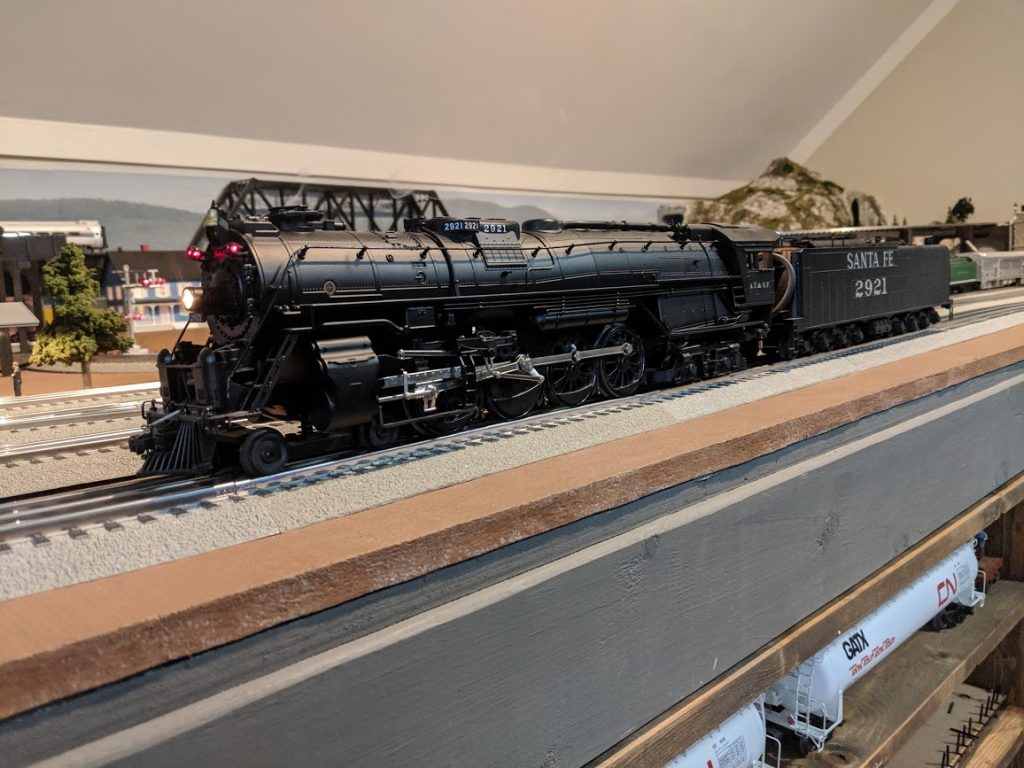
ATSF #2921
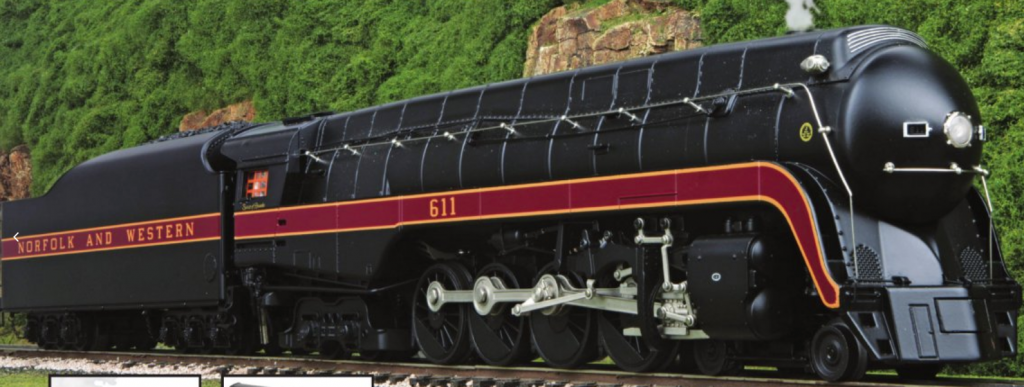
Then the “Expecting” category is a N&W “J” from the latest MTH catalog:
Just like an addict, I am sure more will be added in the future – if I had a crystal ball, I’d say a C&O 4-8-4 Greenbrier…