Gone Fishin’

We completed our “murky pond” scene this past weekend, complete with fly fisherman. We used Woodland Scenics Deep Pour Murky for our water and are pretty happy with the results:

We followed the Woodland Scenics instructions to a T in terms of mixing and pouring the resin. We ended up with some very small bubbles in the resin but opted not to use the heat gun to try and clear them since we had essentially poured the resin to the “rim” since we wanted a well defined “lapping” of the water on the banks. Honestly the bubbles add a bit of texture and depth to the water and aren’t really noticeable from a distance.

Our only regret is not having made the pond bigger and also trying to integrate a stream/waterfall. We still have plenty of “undeveloped” territory on the layout so we may take a crack at making a river on the main level!

Modern Passenger Pulling Power and Scenery

New passenger motive power has been procured! I stumbled across an MTH Premier Amtrak Dash-8 (P32-8BWH) on eBay and was smitten with the Phase V paint scheme.  Also being a sucker for 90s motive power, I had to pull the trigger and I can say I’m very happy with the new addition:

The Phase V paint scheme matches the Phase IV Amfleet cars as well as the recently picked up Phase V baggage car.  While the Dash-8 from MTH may not be entirely scale (It looks like they used an earlier shell mold and trucks) it’s close enough for Slottown!

As for scenery, we’ve finally tackled our small pond project on the upper level – We cut out the pond shape using a rotary cutting saw and used liquid nails to glue on a 1/4″ bottom.  We then used spackle to build up the banks of the pond, then painted the bottom brown and added both commercial and natural ground cover. A short scavenge around the yard turned up a few twigs that match the scale (although fear not should you live in a baren wasteland with no vegetation, you can always buy your sticks from woodland scenics)  Next up, we’ll be pouring in the Woodland Scenics Deep Pour Murky Water solution to give the pond a realistic “Murky” water look and finally our fisherman will have a body of water to snag some trout:

A taste of Chicago

Deep dish pizza, the Cubs, and Metra – is there anything more Chicago than that? After years of hunting for a Metra F40PH to add to my collection and reminisce seeing the real thing for the few years of my childhood in Naperville, MTH offered a new PS3 Railking version in their 2019 Volume 1 catalog. Upon seeing it in the catalog, I quickly put in my pre-order to Legacy Station back in October of 2018. It arrived this week and I quickly headed over to Legacy Station to pick it up.

I’m super happy with the locomotive – the sounds and lights are great, and the fake Chicago accent PFA announcements is pretty great!

It’s interesting to see the new Railking version next to a PS2 Premier version – the shells are sized almost identically but there’s definitely a number of add-on details on the premier version that the Railking version is lacking (as expected) – notably:

– See-through radiator screens and spinning fans
– Windshield wipers
– Marker Lights
– Add-on steps
– Nose ladder hand rails

Foto Friday

With our vacation to France, and addition of Mr. Hobart to our family, we haven’t had a ton of time to work on the layout.  Here’s a few photos documenting what we’ve been up to:

Mr. Hobart himself:

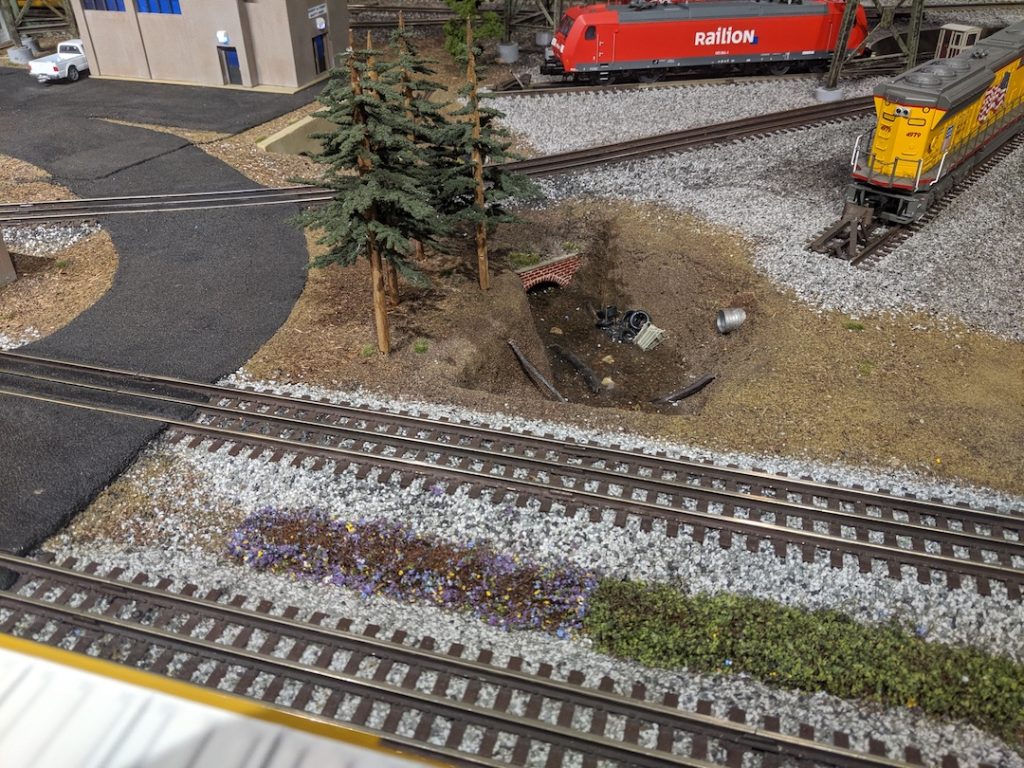
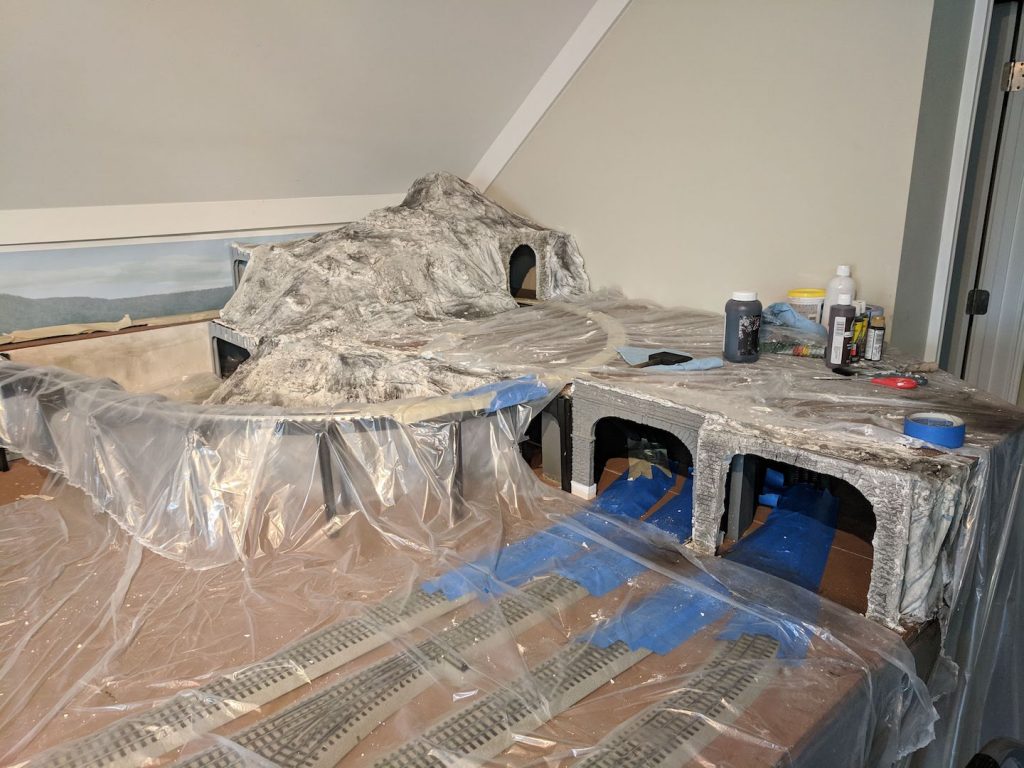
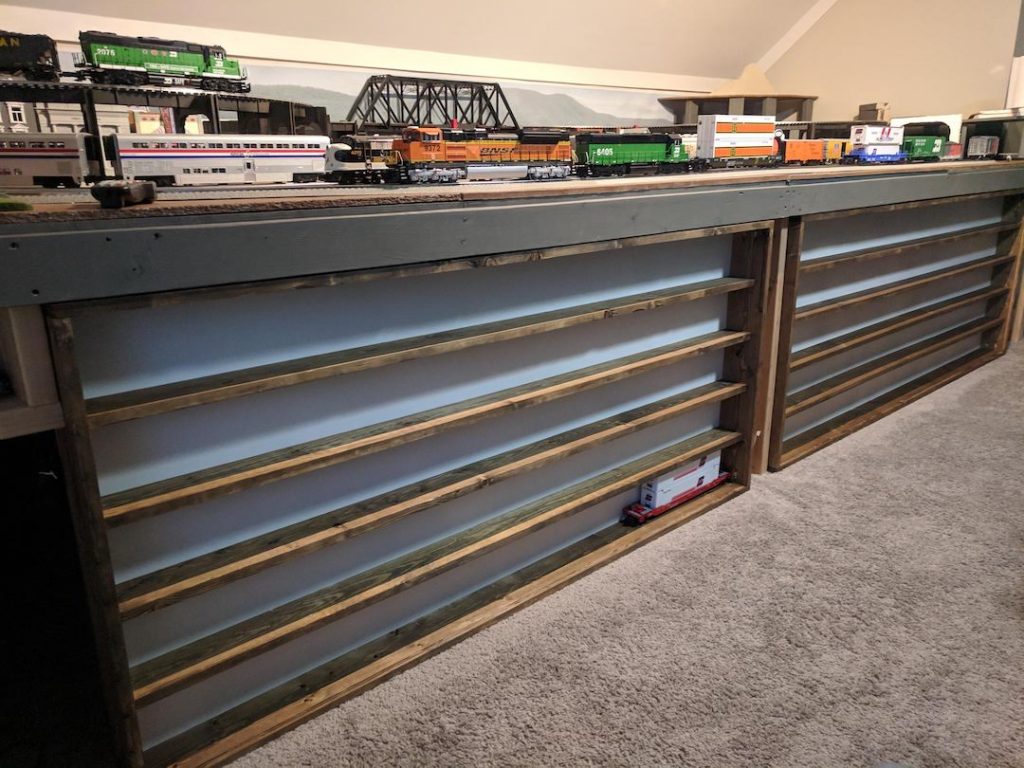
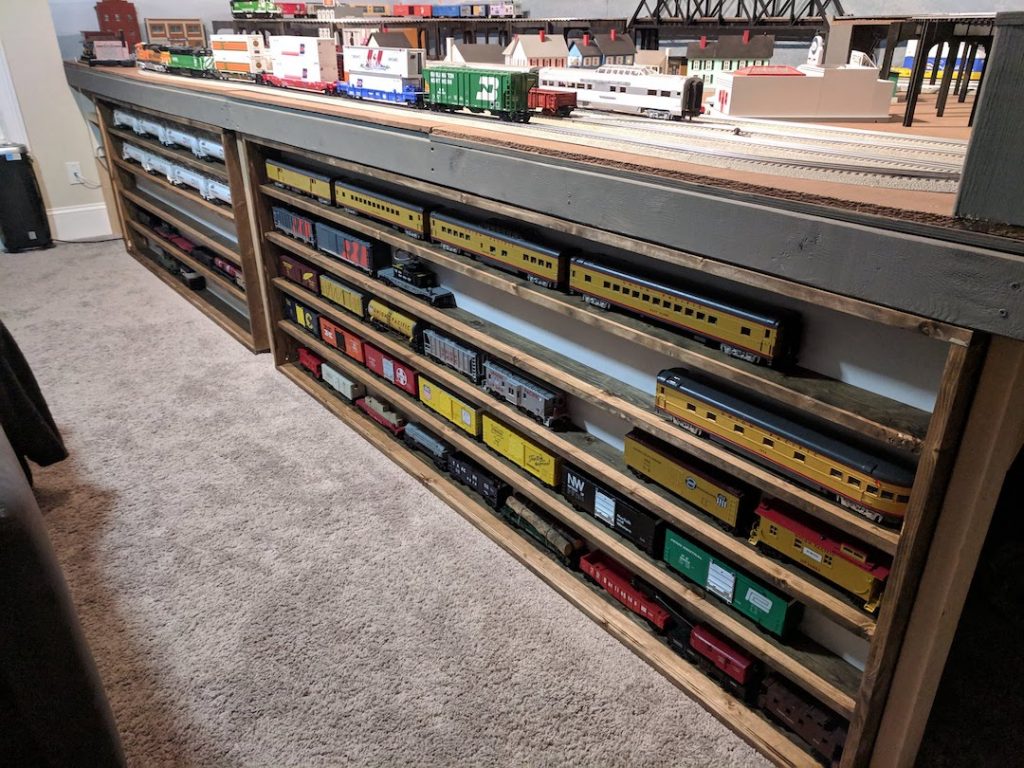
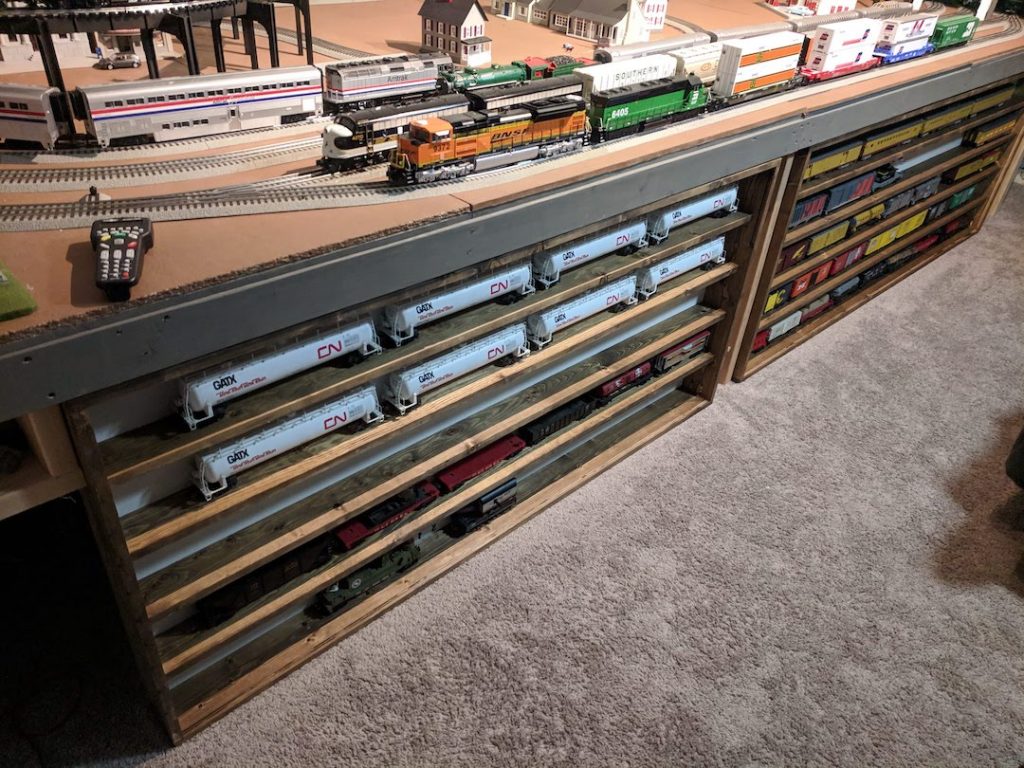
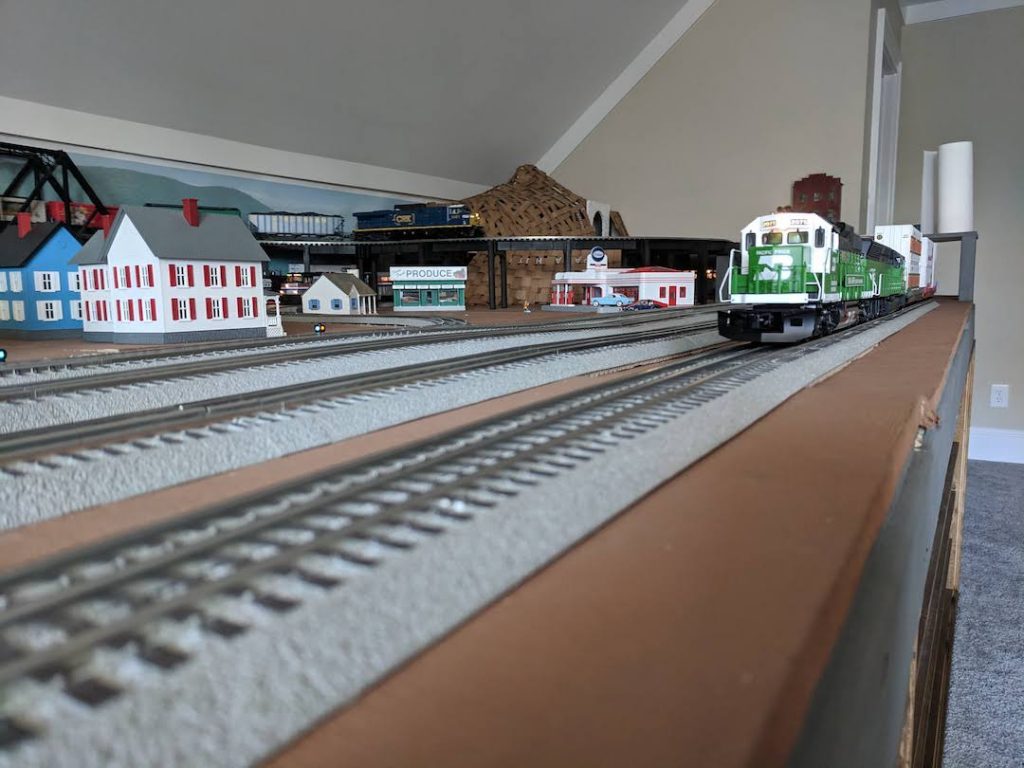
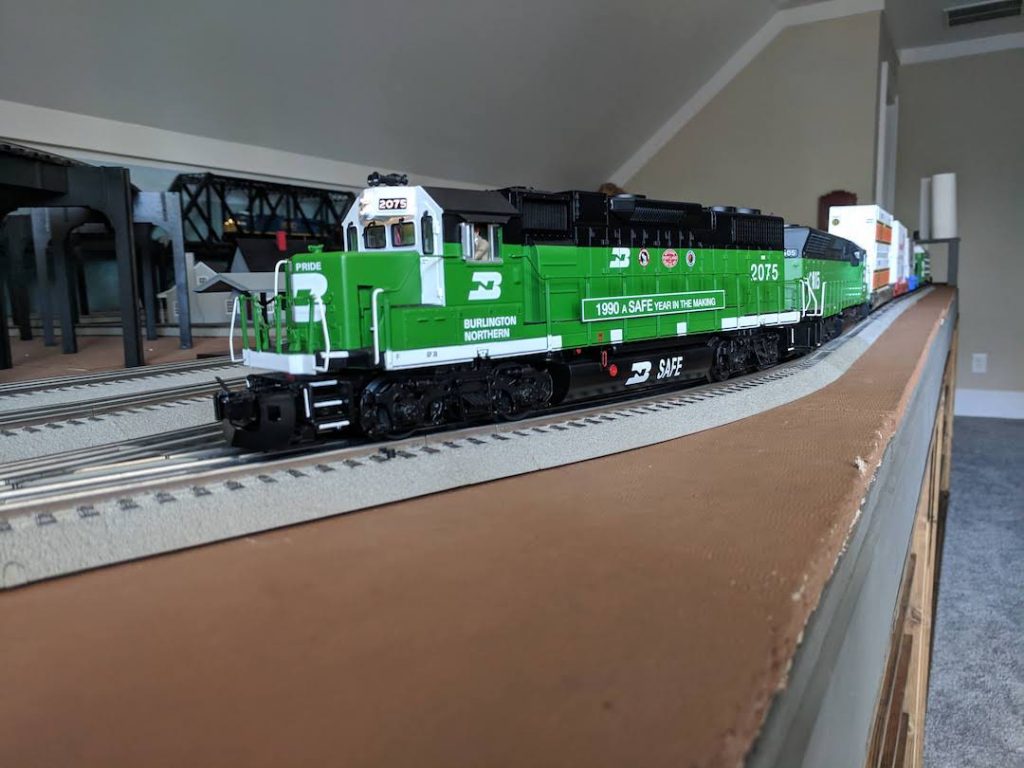
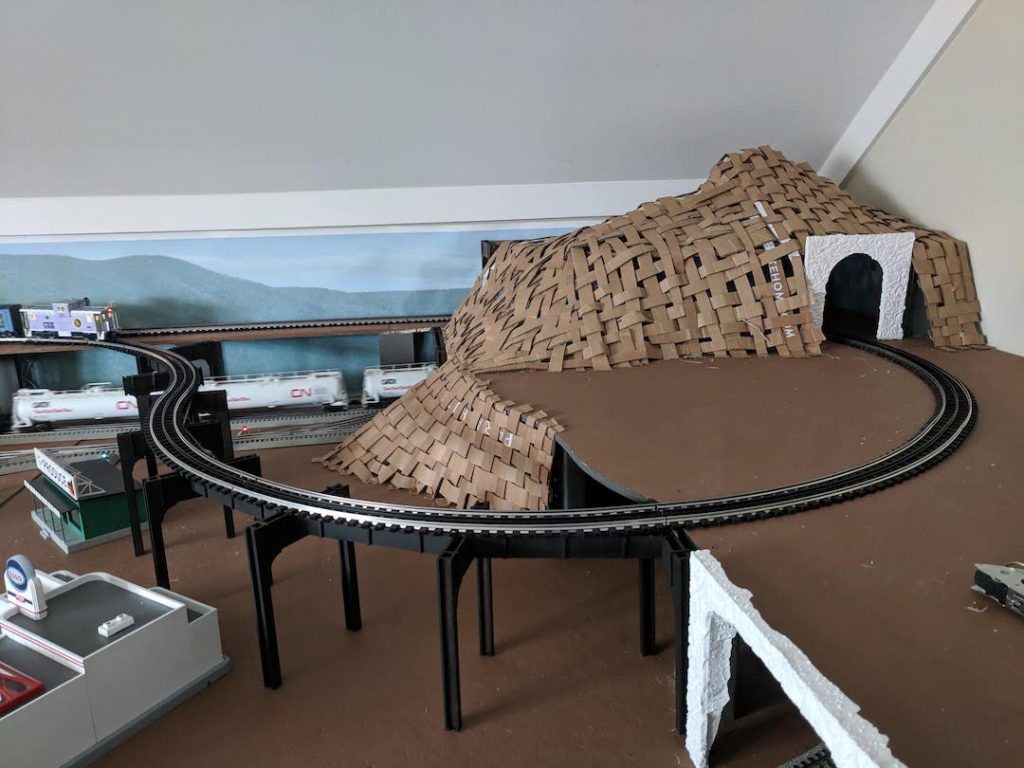
While Hobart is certainly a very sweet boy, he is nonetheless a puppy and one of his favorite activities is to abscond under the train table and look for things to chew on.  As a result, I’ve had to block access under the table.  Initially this was done with boxes and plastic container lids, but when I had time the other week, I built another “mini” shelf to block off the corner.  Conveniently, the width of shelf fits Premier 18″ passenger cars perfectly:

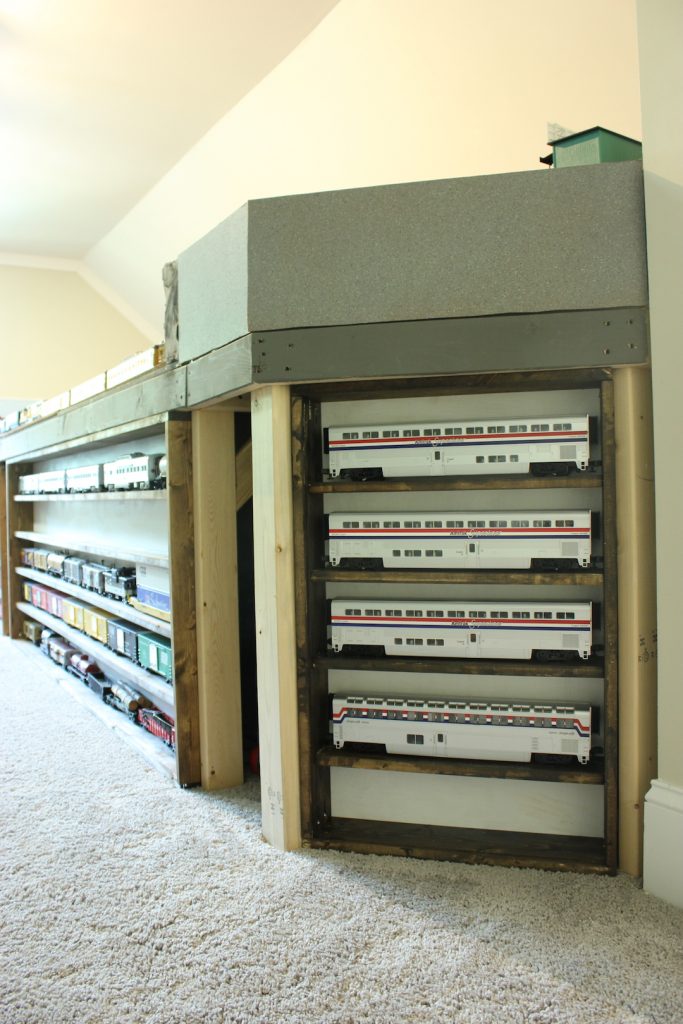
For the small gaps, my plan is to use some spare plywood and either stain or paint it – I’m also considering small skirts, but I’m not sure that will deter the little terror from going under the layout.

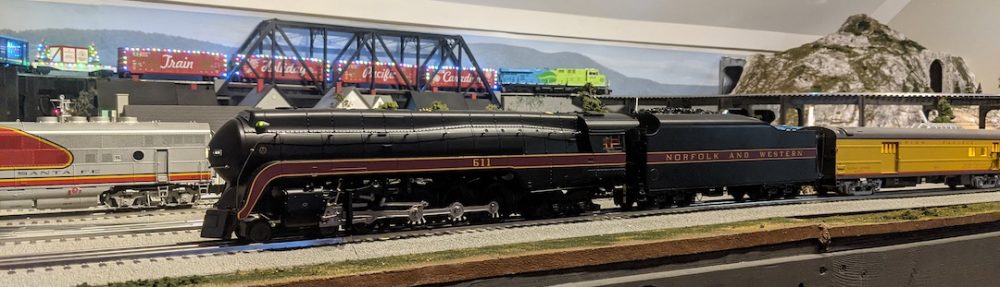
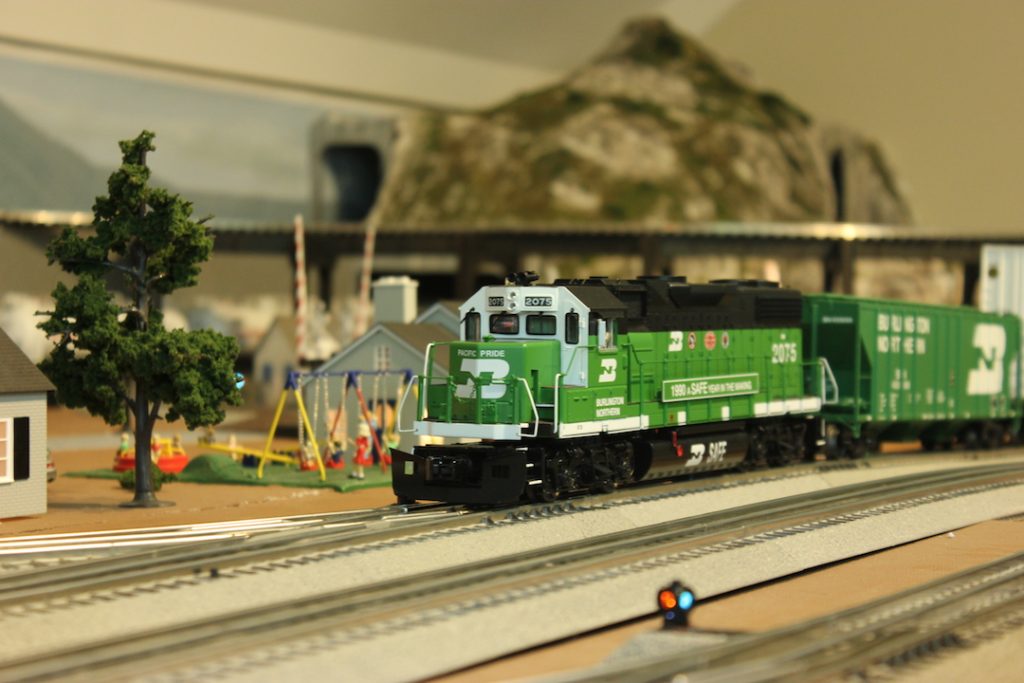
After a meltdown (literally), I had to ship back my GP38-2 back to MTH for repair – it’s unclear what happened, but while on the track and powered up, the locomotive sounds started up on their own (despite being on a DCS-enabled track), then began distorting, then for the finale, a bit of acrid smoke leached out, and the locomotive shorted.  It took a few months, but the locomotive has been returned to operation and is working better than ever:

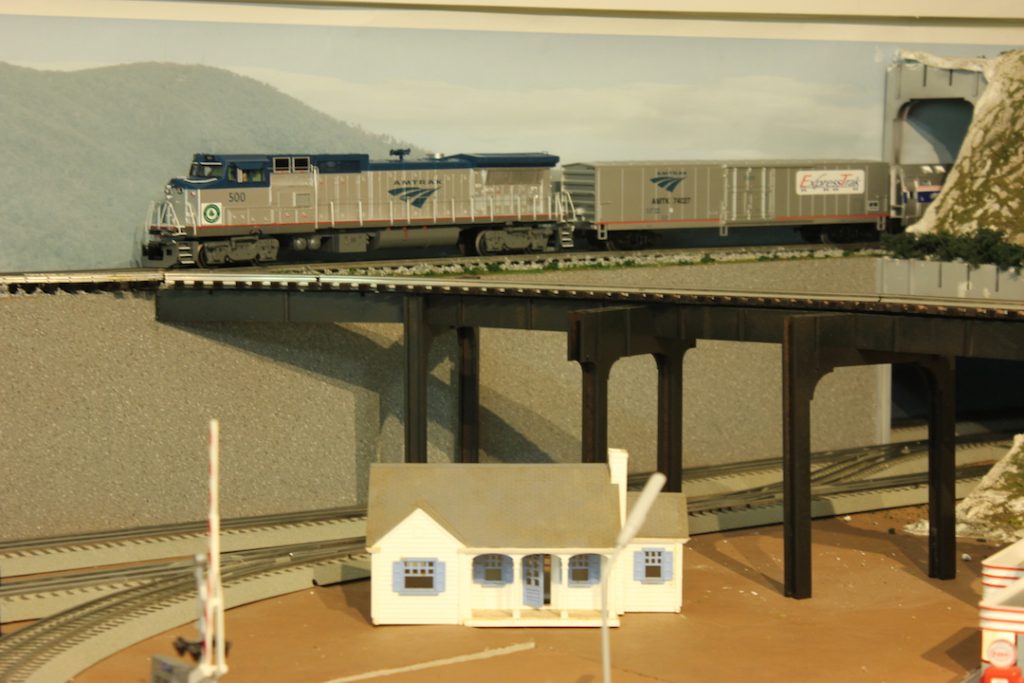
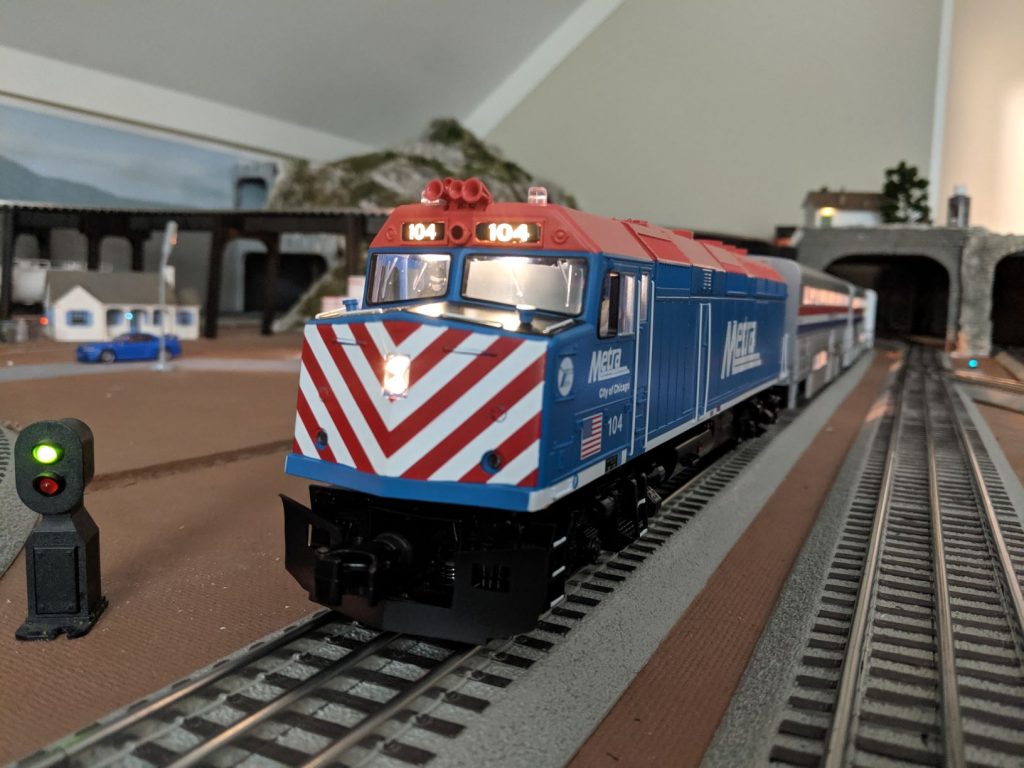
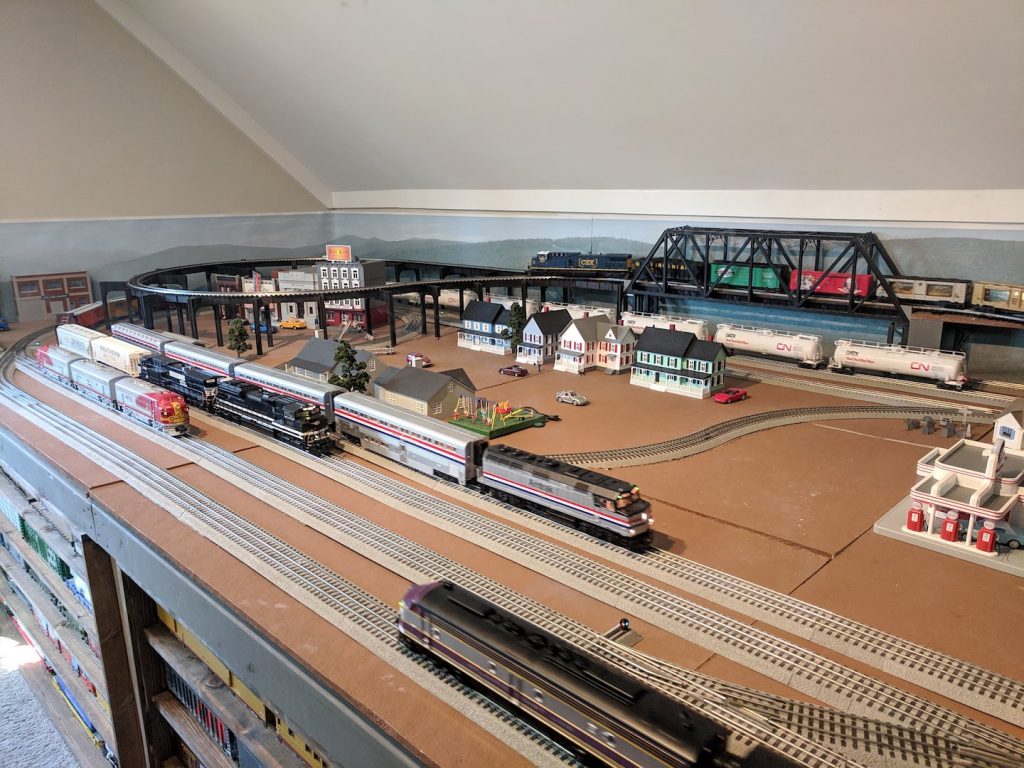
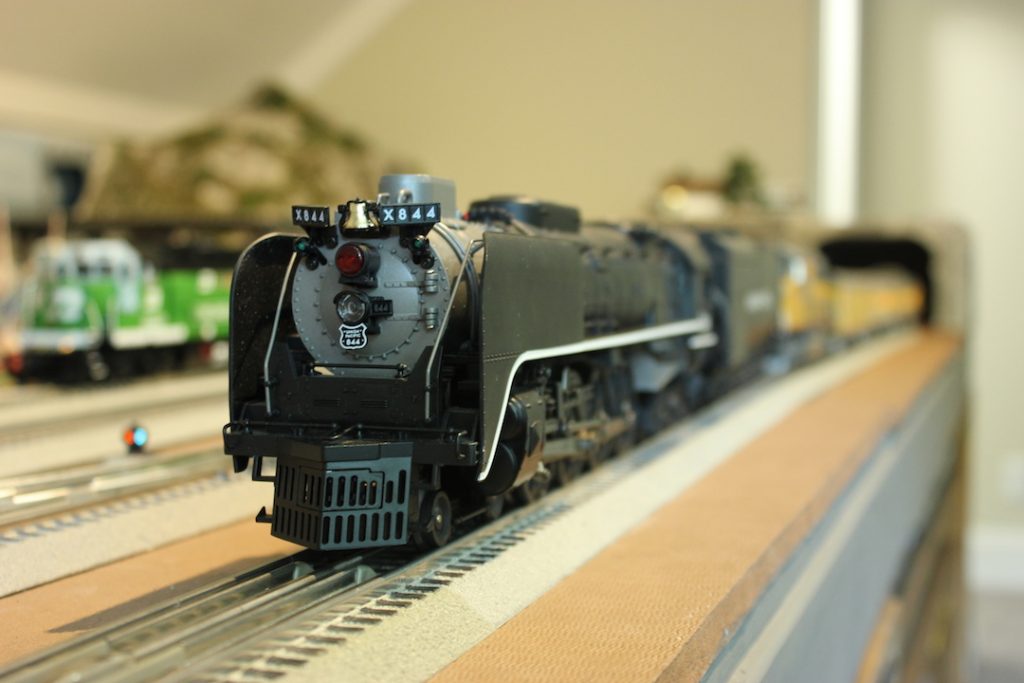
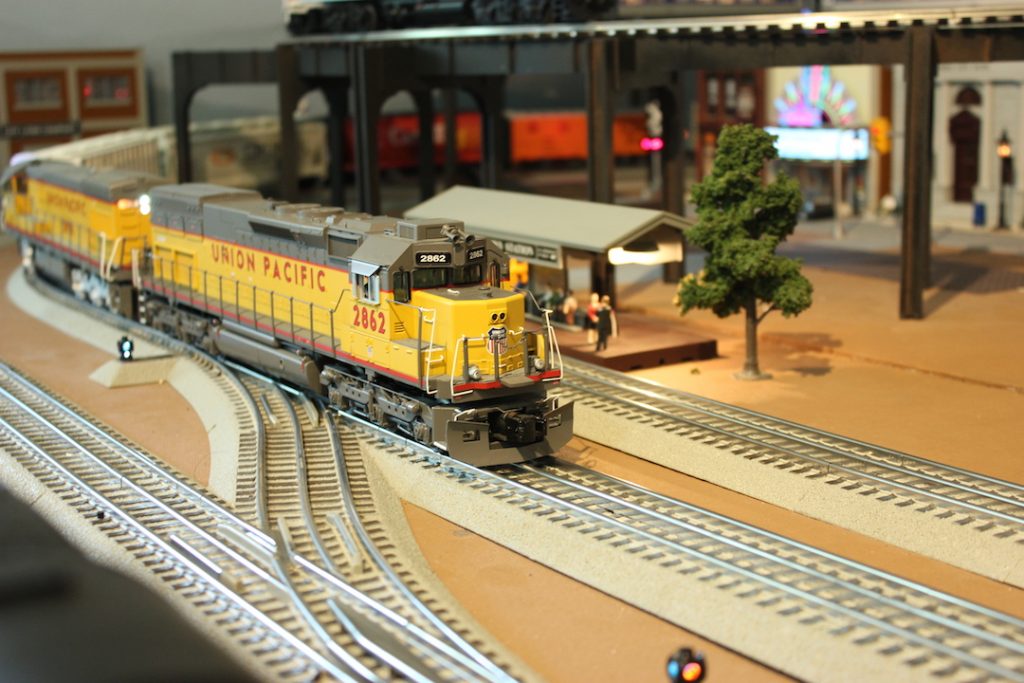
I’m still running the UP excursion train on the main 1 – I have a UP RPO car waiting for me at Legacy Station, I just haven’t had time to drop by to pick it up.

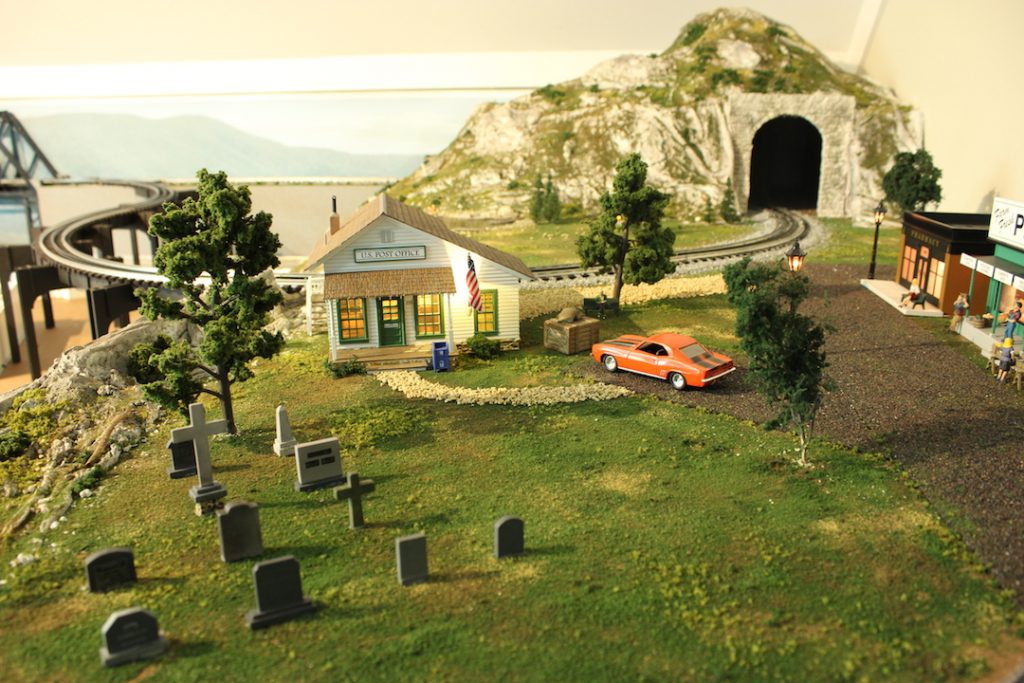
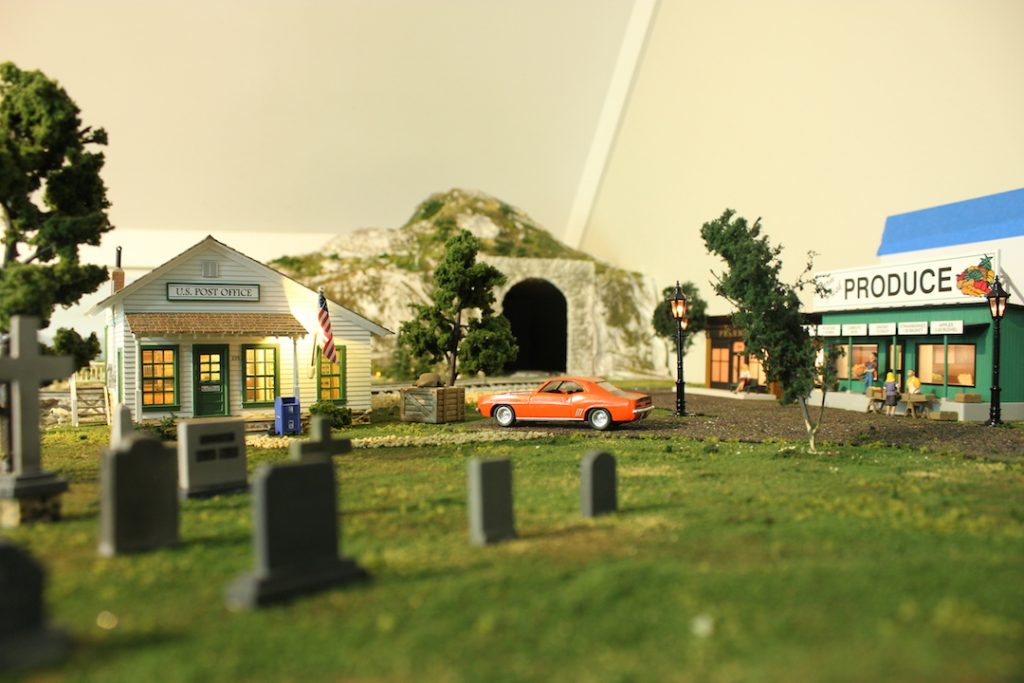
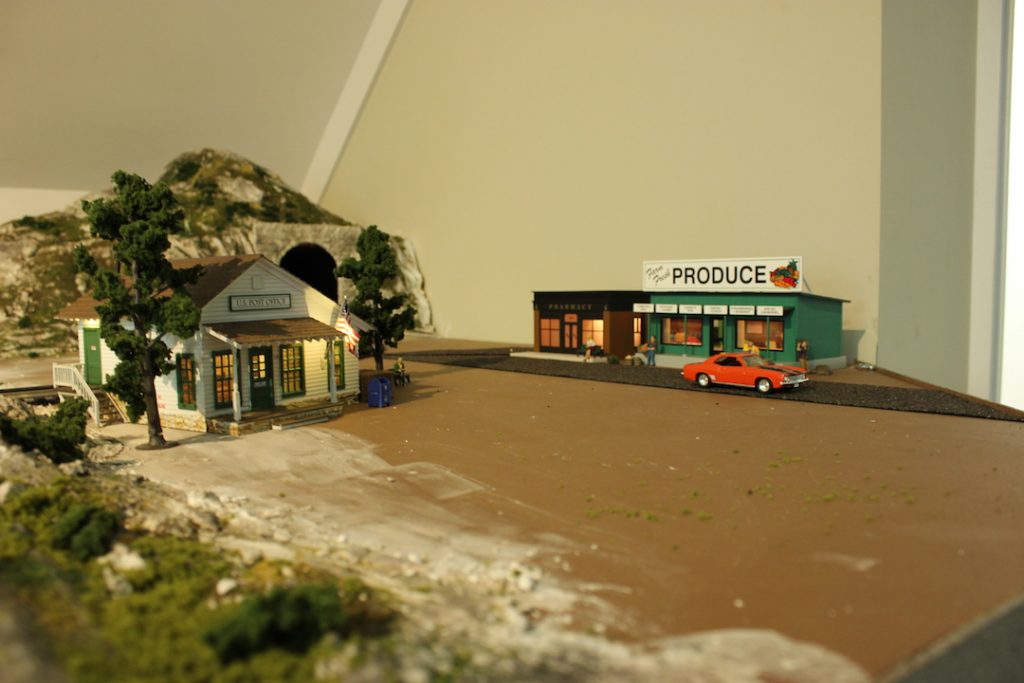
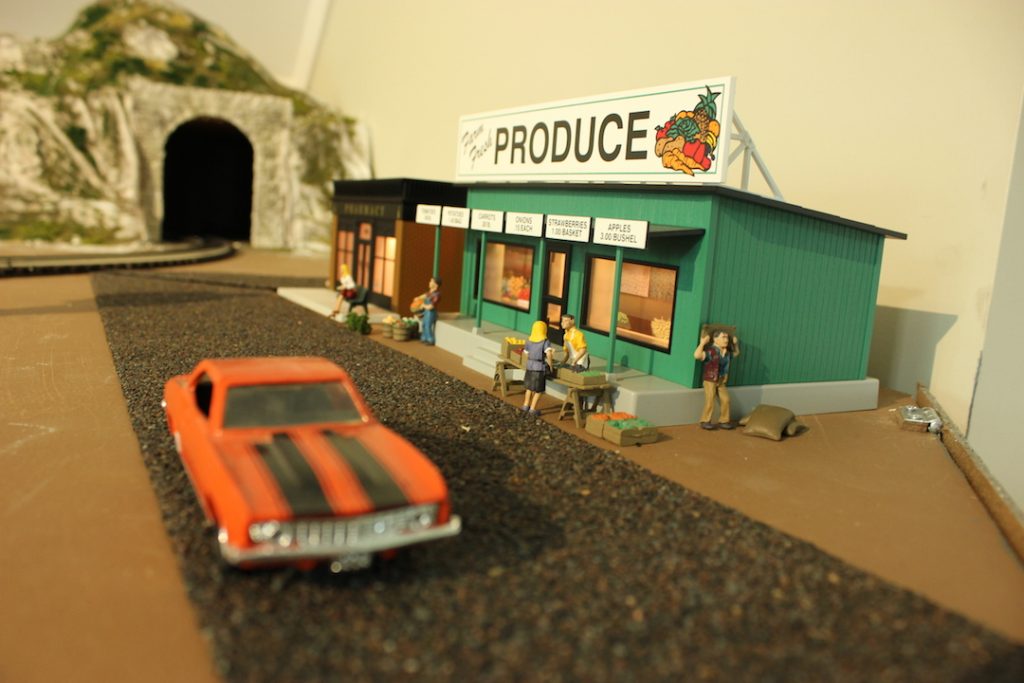
Lydia desperately wanted the Woodland Scenics post office, so we picked one up at Legacy Station and I got the buildings on the second level wired up – next up I need to wire up the street lamps

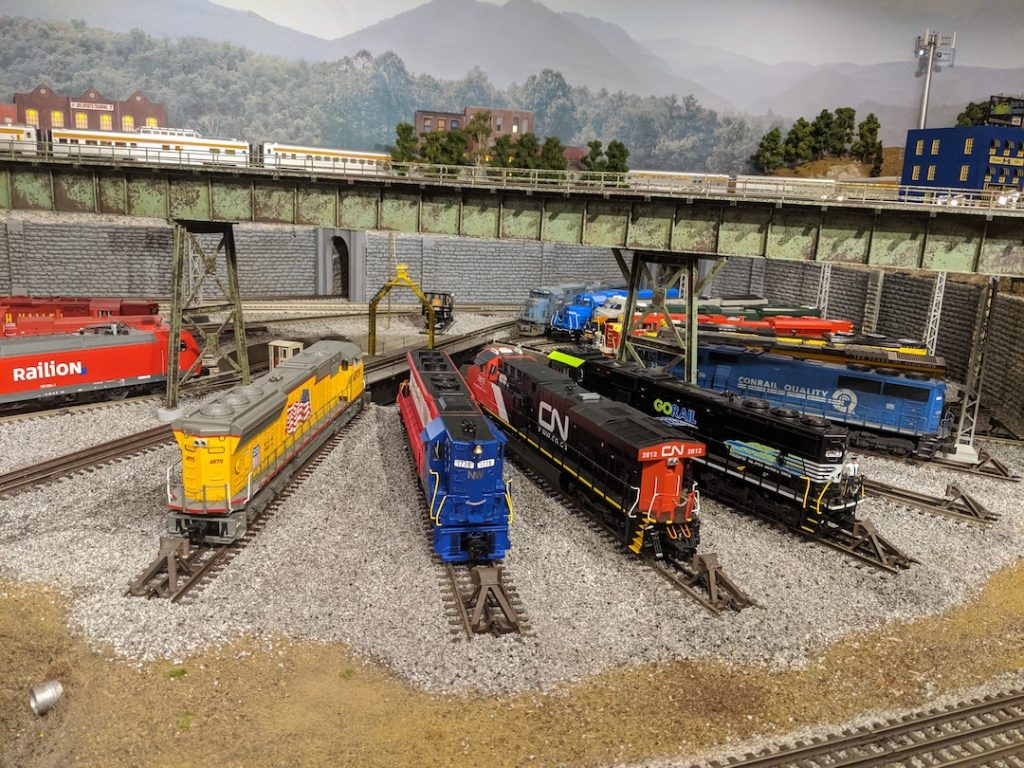
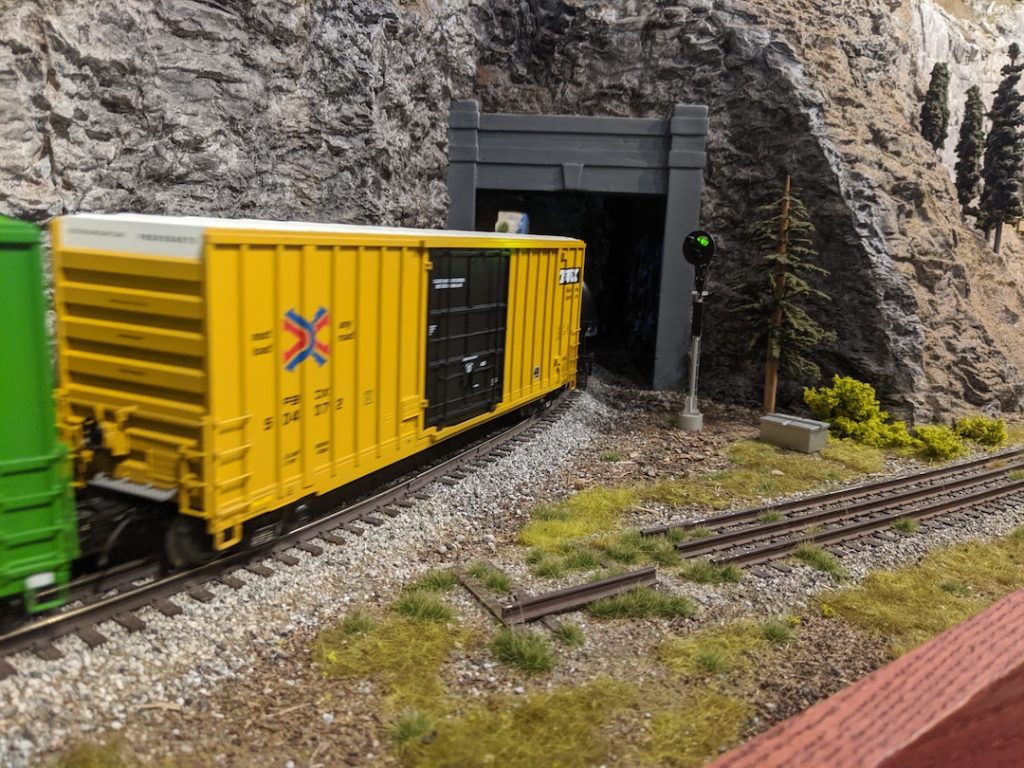
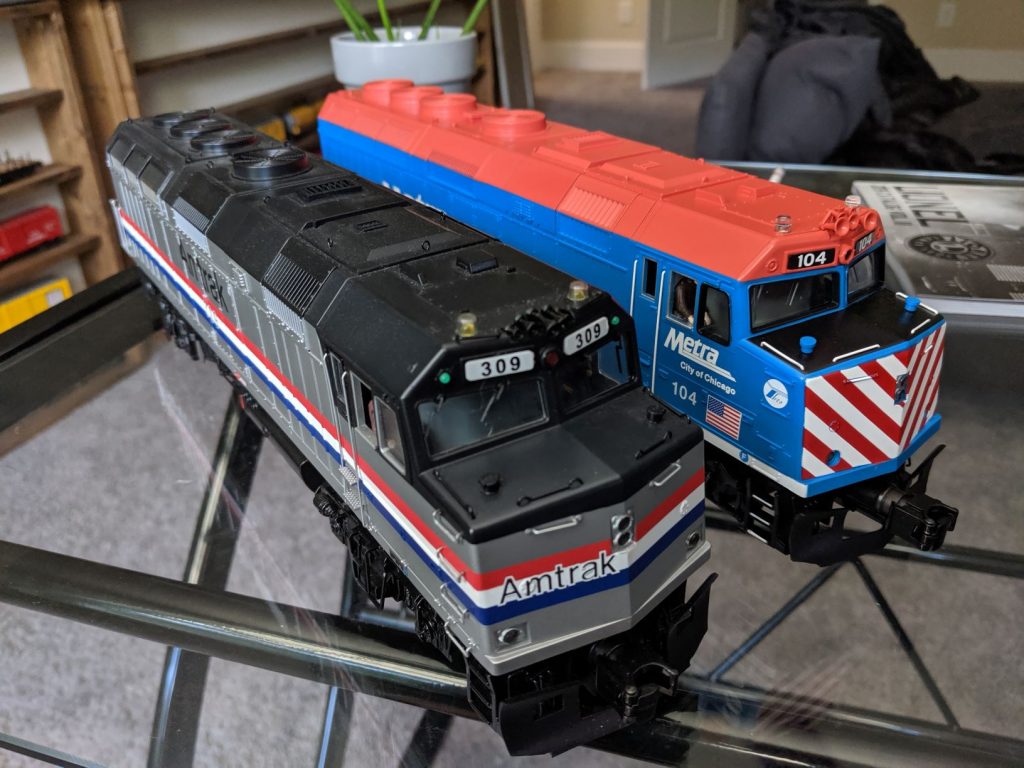
My modus operandi is to typically check eBay once a week for anything interesting that pops up – being a sucker for tunnel motors, an MTH Premier UP SD40T-2 caught my eye.  A little silly, as I already had a Lionel UP SD40T-2 that I picked up at a train show a couple of years back, but I was too tempted with MTH’s version and the fact it had PS3.  I ended up winning the auction and am very pleased with the locomotive. After mulling it over, I decided to sell the Lionel SD40T-2 on eBay. I didn’t quite make my money back, but it helped offset the cost of the new MTH version:

Side-by-side – Lionel in the foreground, MTH in the background

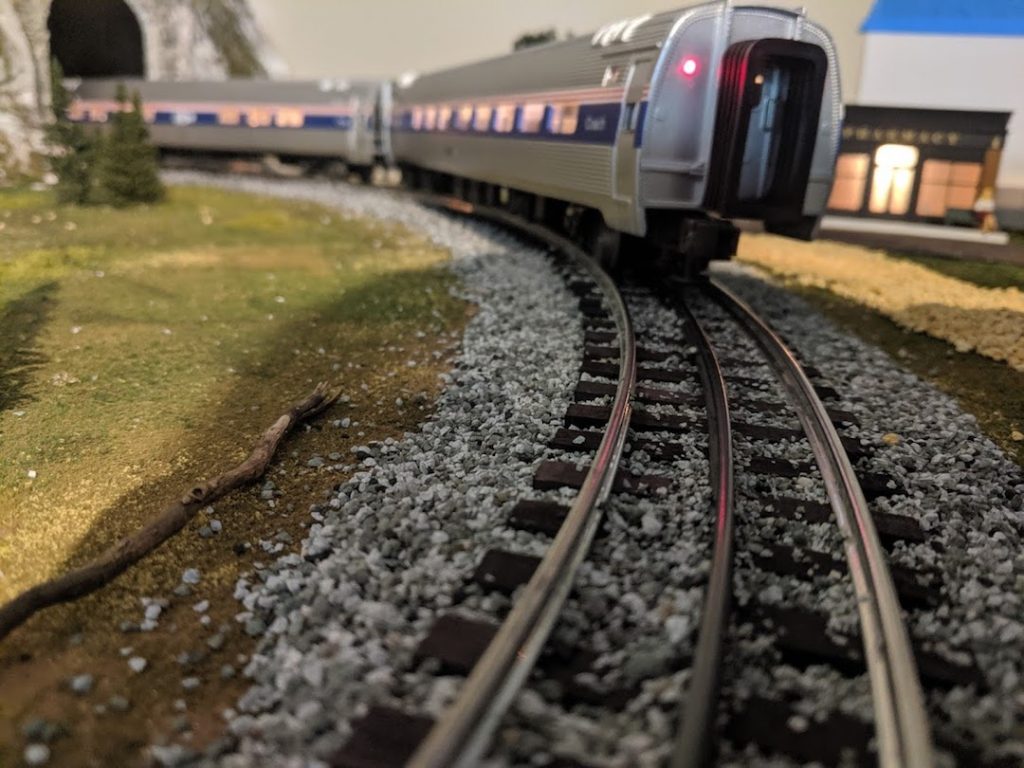
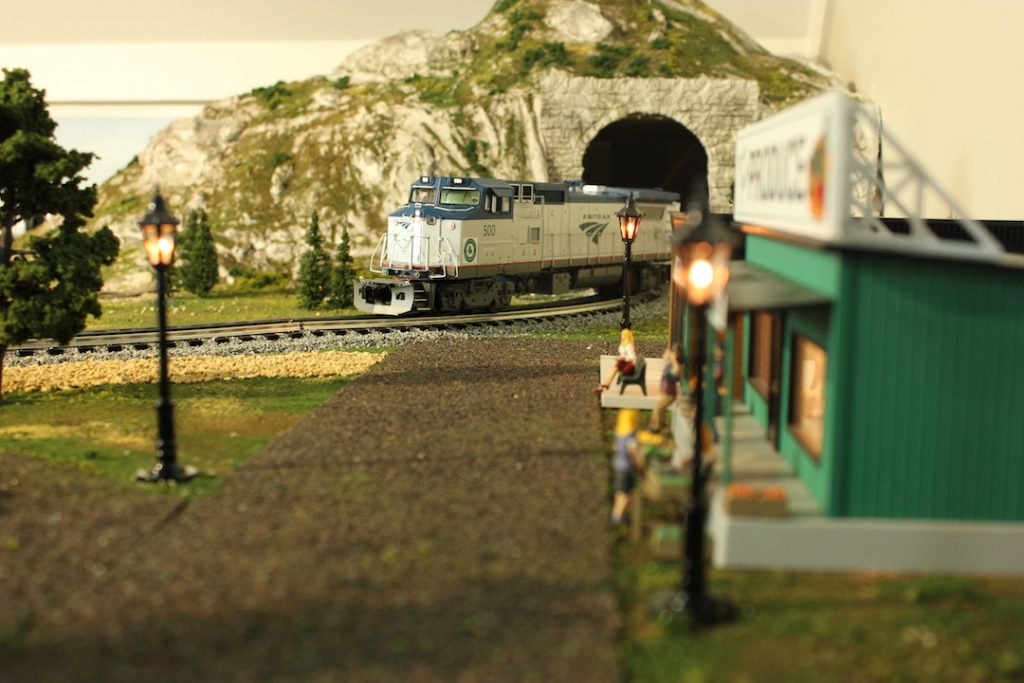
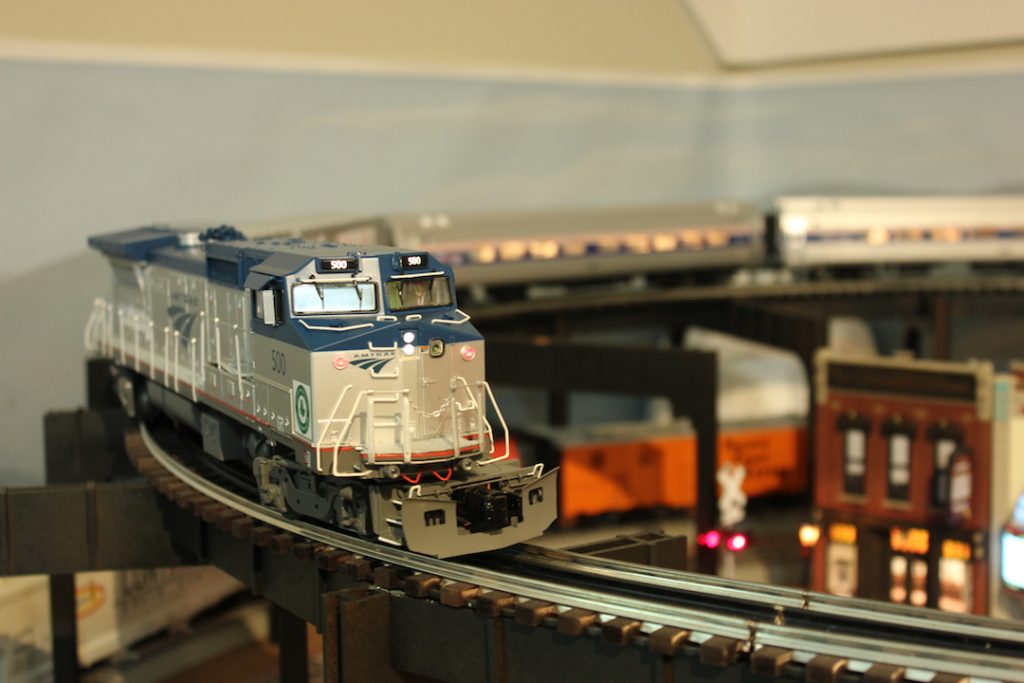
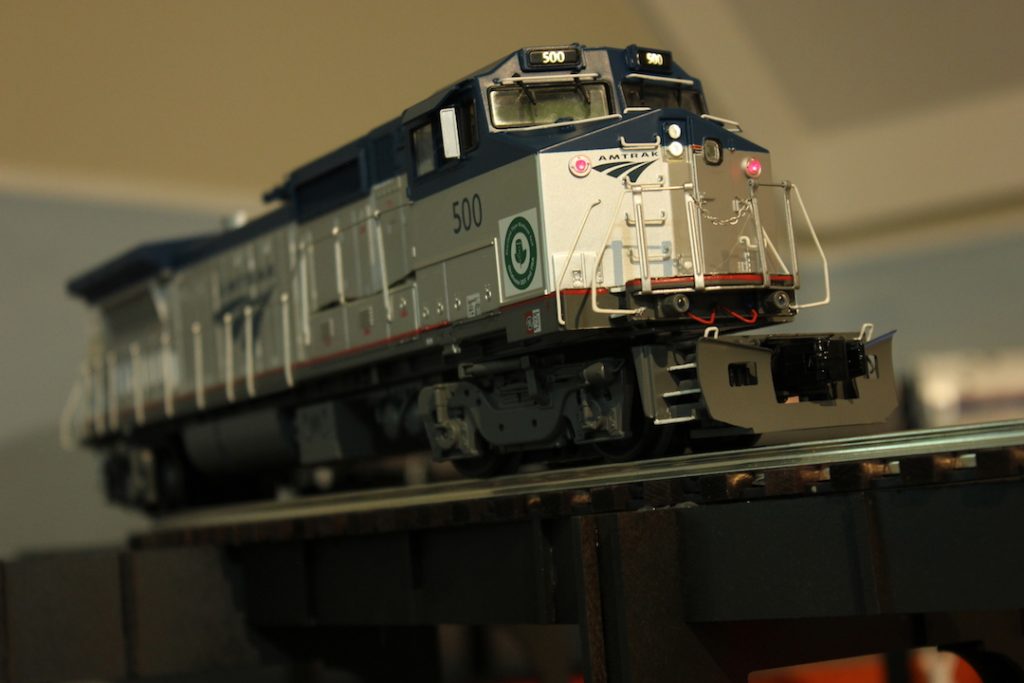
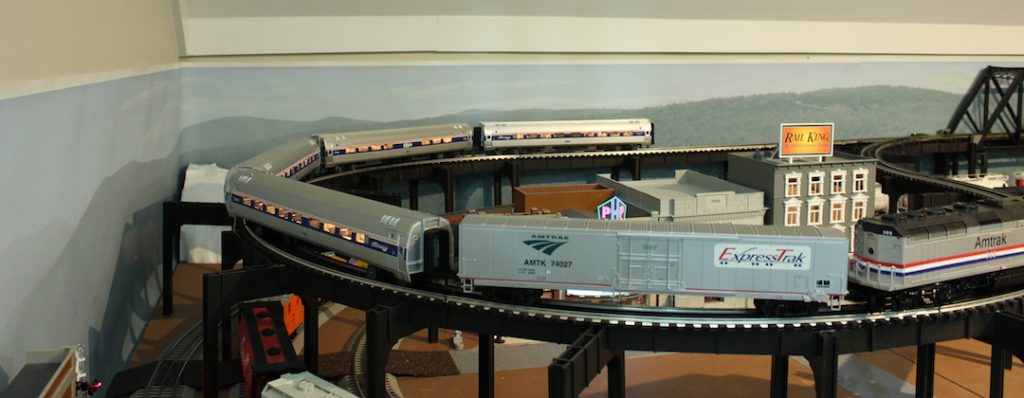
After having taken the Amtrak Crescent from Atlanta to NYC twice, I’ve been wanting to model the train we took up – unfortunately no O gauge manufacturers make Viewliners, which is what we rode in. MTH has however made Amfleet cars a number of times, so I picked up a set I had found on eBay, along with a modern Amtrak Mail car from trainz.com:

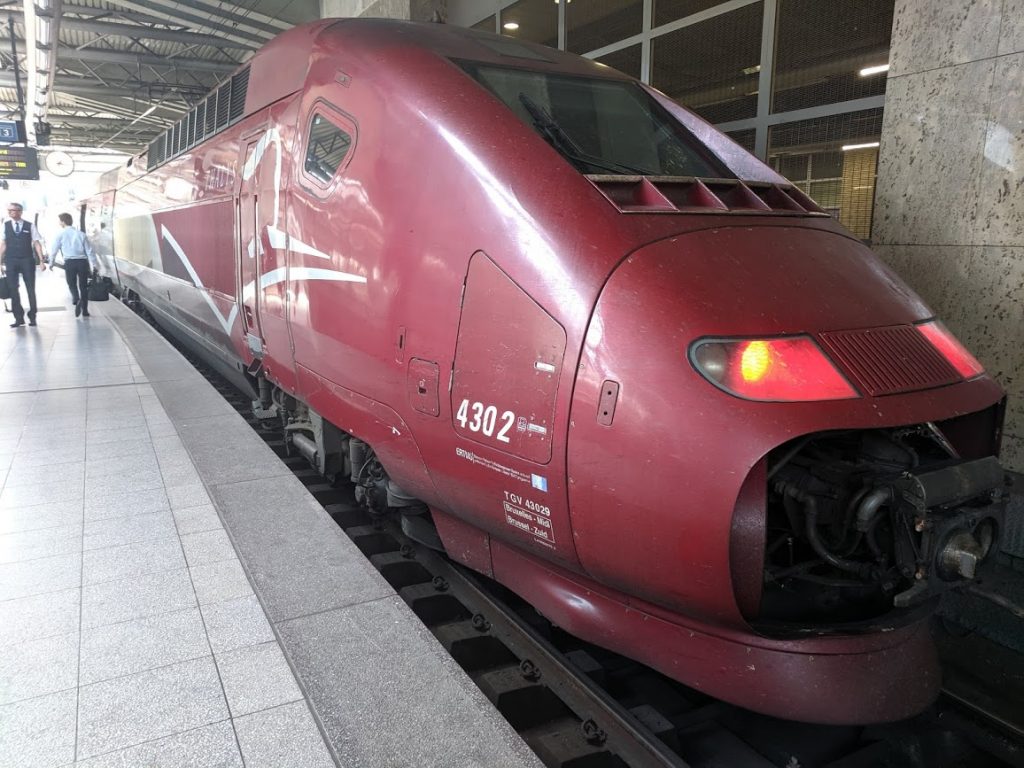
In June, the missus and I took a trip to Belgium and France with some friends and we had the opportunity to ride a variety of TGVs – we really enjoyed the experience, it’s absolutely the best way to get around France! It’s quite a contrast to our experience on the Amtrak crescent – in France we averaged 280km/h (173mph), whereas on the Crescent, we averaged 64km/h (40mph).

Thalys at Brussels Midi:

TGV Duplex and TGV Sud-East at Gare de l’Est in Paris:

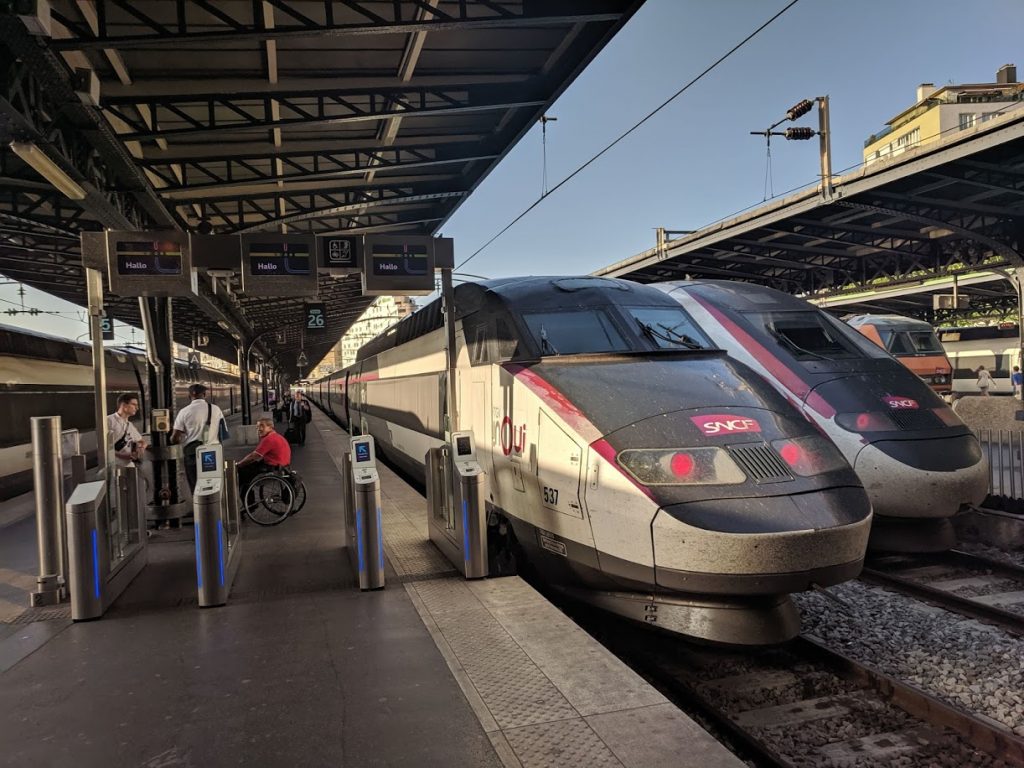
I would LOVE an O gauge model of a TGV – I’m keeping a close eye on MTH‘s European lineup, but I don’t have my hopes high. I may use it as an opportunity to get into N-Scale (I’ve been toying with the idea of a coffee table layout), as Kato makes a number of versions. Additionally, Kato also makes the Amtrak viewliner passenger cars, which are super tempting!

UP Excursion Train

We’ve been making considerable progress on the layout recently, including adding key infrastructure and utilities.  Slottown now has concrete sidewalks downtown, asphalt/bitumen roads, power to buildings, street lights, traffic lights, and crossing signals. While we plan on posting a more thorough update soon, for now here’s a short video showing a Union Pacific Excursion train featuring UP #844 FEF Northern, just like what was run recently in honor of the 150 year anniversary of the completion of the transcontinental railroad (minus #4014 Big Boy since I don’t have one in my collection (yet)):

Making Messes

True scenery has begun! After lots of hemming and hawing (mostly on my part), we masked off the track and table and set to work laying down hard shell on top of the cardboard lattice sub-structure using hydrocal and paper towels (we used the blue shop towels since they are more absorbent and stronger, without dimples). It was about as messy as you’d expect but we masked well and covered all of the rails.  After letting the hydrocal hardshell setup, we then proceeded to apply a number of paint washes using black tempura powder paint, Woodland Scenics stone grey, and Woodland Scenics brown.  We opted for more grey than brown to simulate exposed stone, using our local Stone Mountain and Appalachians as our inspiration (although we know the geographic origins of the two mountain types are very different) – the idea that since our mountain is relatively small, it’s been mostly eroded away down to stone.  All told, we probably did four washes with the stone grey and three with brown

After letting the washes dry, we proceeded to apply ground cover. We mixed a 50/50 mix of Elmer’s glue and water, then starting with Woodland Scenics fine ground covers (earth, green grass, and burnt grass).  We then applied a wetting agent (water with a few drops of dish soap), then applied another top layer of the 50/50 mix of glue and water.  We repeated the procedure with some course ground cover again.

Hat tip to Eric Siegel and his YouTube series, where we used his “Building O Scale Mountains” for our washes and scenery

Next up, we will likely add some small trees to the mountain, lay down our roads, then start laying down additional ground cover on the homasote.  We also need to cut out footprints for a few of the buildings that have too-tall of bases (MTH gas station, bank, and train store).

For now, we’re just happy to be able to run trains again since all of the masking tape and plastic precluded us running trains for a little over a month.

Mountain Weaving

We’ve made some progress over the past couple of weeks working on Slottown – in large part due to having a bit of time off work for the holidays, as well as having some cold, wet weather, layout building and train running has been high on the agenda.

First up, I built some display shelves to line the layout and store unused rolling stock and locomotives.  This was my first attempt at building proper display shelving and I had quite a bit of assistance from a fellow model railroader, Shop 13. He was kind enough to lend me his tools, time, and most importantly, his expertise to help me build my display cases. We sourced our wood from the local big box store, where the frames are made from 1x5x8 pine, the shelves out of 1x4x8 pine, and the rear backing using 1/4″ thick sanded plywood.

We used a table saw to cut two 1/8″ thick grooves 1/4″ apart on each 1×5, which will eventually be the “tracks” for clear acrylic sheets that will slide back and forth as transparent doors.  We then used his mitre saw to cut each piece to length, then finally we used his Kreg system to create pocket screws to better conceal the screws and ensure 90 degree joins.

I brought all of the cut wood home, then stained it using my favorite stain, then painted the plywood backing white on one side.  I still have yet to order the acrylic sheets for the doors, but the shelves are in-place and being put to good use:

After my BNSF trip for work (see previous post) I was inspired to add some more BN/SF/BNSF rolling stock to the collection. My local hobby shop just happened to have a new MTH Premier BN GP38-2 on the shelf, for which I was smitten. I’ve brought it home and have been enjoying running it, however there appears to be some kinks with the DCS and protosound board.  I’ve been troubleshooting it using factory and feature resets, for now it’s running well but I’m keeping a close eye on it:

Lastly, we’ve finally dived in on our mountain/tunnel project, where I’ve built a 3rd level platform and ridge line out of wood, which we then used to anchor a cardboard weave, soon to be covered with plaster cloth hardshell.  While I completed the wood support aspect, Lydia was the primary geologist who created the cardboard weave.  We’re aiming to apply the hardshell this or the following weekend:

We also took a stab at creating custom tunnel portals using hydrocal plaster and foam molds. The results are mixed – the good news is we’ve cast them to the width and height clearances we needed, the bad news is the plaster still needs to be etched and painted, which is a fair bit of (messy) work

Field Trip: BNSF Kansas City Rail Yards

In mid-December, I had the opportunity to head out to Kansas City, MO for BNSF to install some IT equipment in their Kansas City intermodal yard which will host workloads that control some of the container cranes.  As part of the visit and because they know I am a train nut, the customer organized a yard tour of both their Argentine hump yard and the LPKC intermodal yard.  Since I am not a BNSF employee and have not undergone the mandatory safety training, I was not able to actually get on or in any of the locomotives or on the track in the yard, so most of my photos were from inside the vehicle.

Video of refueling facilities:

An old Santa Fe bluebonnet SD40-2 and a newly repainted/rebuilt SD32ECO (previously an SD45-2)

A C44-9W idling:

A long-nose SD40-2 with remote control equipment installed

Me beaming in front of the Dash-9:

The hump yard was super interesting – the entire yard from the hump down to the sorting tracks is completely automated. As the cars approach the hump, each freight car is identified via an RFID identification tag. Any unreadable or unidentified cars are sorted to a designated inspection track to the side of the yard. All cars are then weighed and counted, then released at the top of the hump.  Gravity does all of the work from there on out along with a series of retards that “pinch” the flanges to slow the cars down.

The car(s) need to end up on the correct sorting track and ideally at a coupling speed of 3-5mph, which is a function of car weight, number of curves where the cars may lose momentum, distance for which the cars need to travel (as sorting tracks fill up when they build trains, the distance reduces). They measure where the last car on the sorting track using electrical signals through the rails.  The last car’s trucks “short” the signal and the distance along the track can be calculated.

The yard and hump is graded and surveyed extremely accurately, so the system “knows” the speed at which the car(s) need to travel through the yard and when they should reach each checkpoint, however other factors such as wind speed and direction, precipitation, load aerodynamics, wheel bearings, etc can result in the car(s) deviating from the ideal speed based on the algorithm.

As the car(s) move through the yard, their speed is measured at set points using radar (similar to what Police used to use before switching to laser speed detection), and the appropriate amount of force applied to the retarders is calculated to determine how much speed to shave off.  Note that cars can only be slowed down (never sped up) so it’s critical that no more than necessary is shaved off. The yard control system is so intelligent that the retarders are actually applied while the wheels are moving through them at different times to even the wear on the retarders themselves.

If all goes expected (which happens the vast majority of time), the cars are sorted into the correct sorting track, couple at around 5mph (although admittedly they have tolerances up to 7, since it’s better to err on the side of speed) and trains are built.

In the event that a car is sorted incorrectly (less common), a knuckle left closed, or a brake was left on (more common), they will temporarily pause operations and send a switching locomotive out to move the car.  Most of the switching locomotives are remote controlled as well with a big remote that an engineer straps on and can control while on the ground.

I wasn’t able to take any photos within the control room since the system is proprietary, but it also speaks volumes to BNSF as an organization – they deployed their own hump yard control system entirely in-house and the system is incredibly impressive.  They are currently rolling out the updated system to hump yards across their trackage.

I wasn’t able to get any photos at LPKC due to where I was sitting in the vehicle, but here is a photo of the facility (not my photo – taken by BNSF Logistics):

Field Trip: Eric’s Trains

It’s been a minute since I’ve posted an update to the site, mostly because we’ve been busy with other things aside from trains (house projects, holidays, weekend adventures, and work).  That being said, we did take some time today to head up to Woodstock, GA to check out Eric Siegel’s layout as part of the Piedmont Pilgrimage. Eric is well-known in the hobby thanks to his YouTube series Eric’s Trains.

We arrived right as doors opened at 10am and were surprised to see there was already quite a showing. We were greeted by Eric’s partner who was extremely warm and accommodating. We learned from her that they expected about 500 people to visit today which is incredible and a testament to their hospitality and hospitality!  We admired Eric’s collection on display as we made our way down into the basement to see the layout in person.

In the basement, quarters were tight due to the number of people visiting as well as the sheer size of the layout, but we managed to make it to every room to see the layout in its entirety.

Our first takeaway was what an incredible job Eric did making use of his space – it’s a bit difficult to get a sense of scale of the room and layout from his videos and his live webcams, but when you see how the different rooms and tracks tie together in person, it’s incredible. He has done an amazing job of maximizing his trackage in an interesting and dynamic way within the bounds of his rooms. The trains weave in and out of tunnels, around buildings, over roads, and through multiple rooms, making the operation of the layout mesmerizing and entertaining.

Our second takeaway was the immense amount of detail featured on his layout – not just realistic scenery, mountains, and buildings, but also details like figures, roads, backdrops, and terrain changes. It’s obvious up close just how much time, effort, and thought has gone into his layout.

Our third takeaway was how impressive Eric’s collection is.  If you watch his YouTube series and see his hundreds of reviews and how-tos, this won’t be a surprise to you, but much like the effective use of space, you don’t get a full appreciation until you see it on display, both in cases and in operation.

Our last takeaway is that Eric is a really good guy – never mind the fact that he welcomes an untold number of strangers into his home, he takes the time to answer questions and speak with his guests.  I’d be lying if I said it wasn’t a bit surreal to finally get to meet him in person after watching hours, we felt like we already knew him, however at the same time, he knows nothing of us!  We really enjoyed speaking with him, learning about his collection and layout, and gleaning tips and tricks on how he created his masterful layout. Selfishly, we wish we could have stayed and talked with him all day, but we know he had other guests to attend to, and trains to run!

All in all it was an incredible experience and we hope to see him again soon!  For more information on his layout, collection, and himself, check out his web site. Here are a few photos from our visit:

Not-so-modern Pulling Power

After my normal perusing of eBay and Trainz.com, I found a few locomotives that peaked my interest (although aren’t on my short list). Despite my attempts to keep myself to a “short list,” I did find a deal I could not resist – so welcome to the fleet an MTH NYC 2-8-2 Mikado:

The downside of my “eBay special” is that for some odd reason the drawbar was missing from the locomotive. I followed up with the seller who was not able to locate the drawbar, so I had to fabricate my own.

I used another similar generation PS2 locomotive and pulled the drawbar to measure and came up with the following using my digital calipers:

78mm Long
7.55mm Wide
2mm Thick

I went to Lowes to look for some brass or metal to make my drawbar but the best I could find was some ~1/16″ thick “welding plate.” I used a chop saw with a metal cutting blade to cut my plate into a rectangle (took far longer than I had hoped – chop saw was not ideal for the application but it’s the only heavy duty metal cutting tool I have as I didn’t thing the dremel would cut it (pun intended)). I then used my vice and a dremel to grind down the bar to the shape close to the MTH part, then I drilled my two holes in my drawbar, before giving it an even coat of black metal spray paint.

End result worked the charm, can’t even tell it’s not the original piece unless you pull it off the locomotive and inspect it.  That being said, all told it probably took me about 1.5 hours worth of effort (not including the time spent milling around Lowes looking for materials).

Would I do it again, I’d probably use ABS plastic from Plastruct or Evergreen… alternatively I do have a jig saw with some metal cutting blades, but I’m not sure the jig saw blade is substantial enough to cut through 1/16″ steel.